
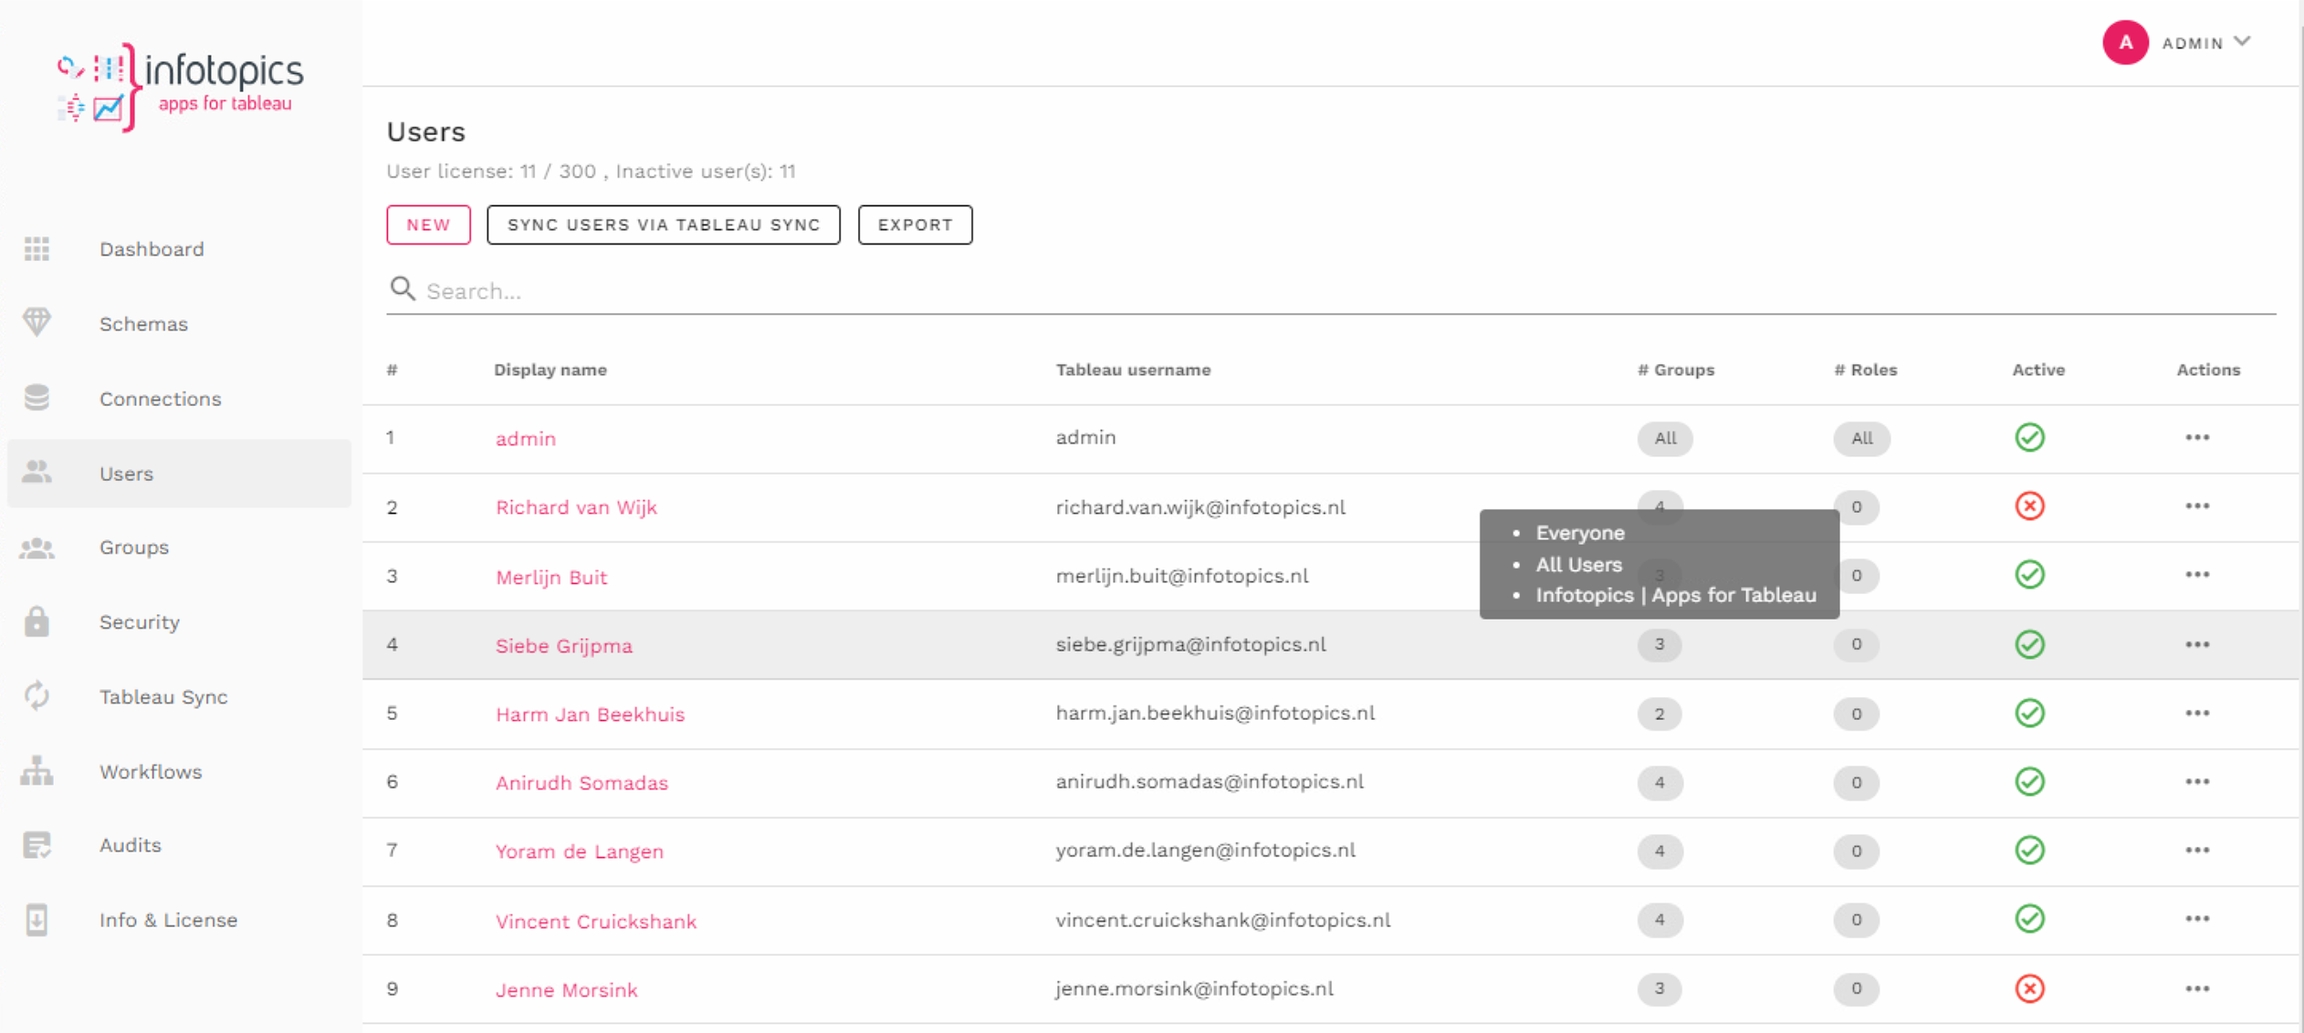
User management
Whenever somebody opens a dashboard with the WriteBackExtreme extension inside, this user will automatically be authenticated and registered as a standard user in the Management Console of the Extension. If the user already exists in the Management Console and has access through a group to the schema, the extension will show. If the user does not exist, they are registered as a standard user and part of the “everyone” group, only being allowed to see schemas attached to this group.
Users are stored in the Management Console for several reasons. The WriteBackExtreme extension has a user-based license model. Therefore it is important to register every user which needs access to the extension. Secondly, by having the users in the Management Console, you can manage which users are able to use the schemas that are available by placing them in groups.
Rules
A user belongs to one or more groups
Permissions are not set on a user basis but on a user group basis (except for the admin permissions)
In order to use the extension a user must be registered in the Management Console
Row Level Security can be assigned to a user, a group, or a combination of both
A user without a role does not have access to the Management Console
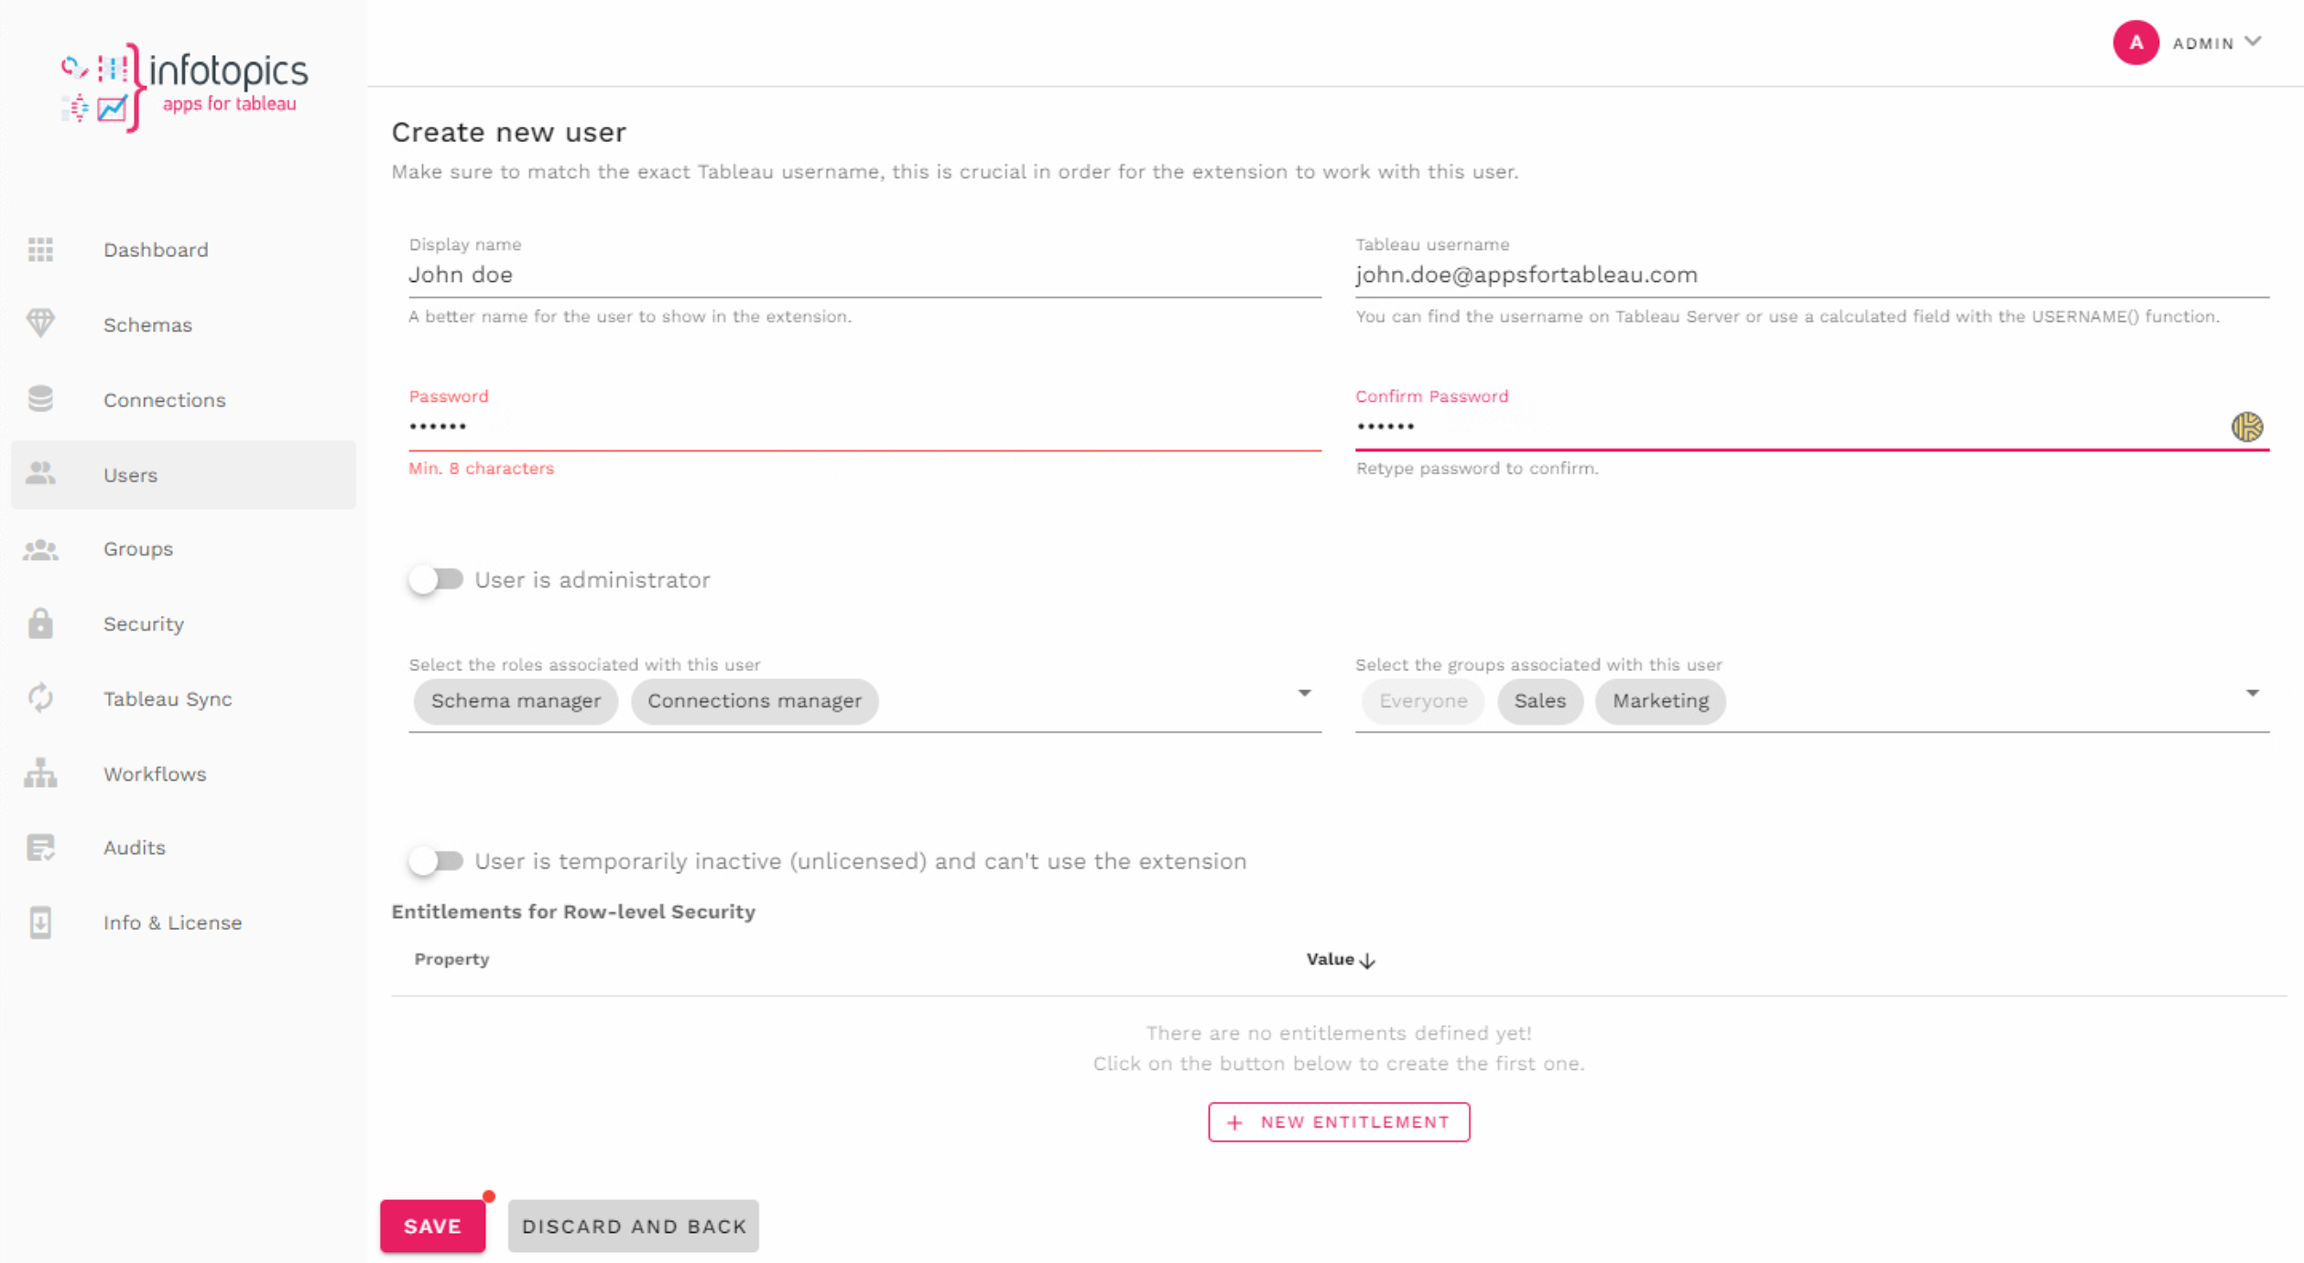
Roles
Users can be assigned roles in accordance to their authorised actions within the Management Console. When creating a new user, or editing an existing one, the following roles can be assigned:
Connection Manager: Can create connections, and edit existing ones within the scope of their assigned groups
Schema Manager: Can create schemas, and edit existing ones within the scope of their assigned groups
User Manager: Can create and edit existing users (non-admin) and groups
Admins have access to every aspect of the Management Console, regardless of groups.
Create a new user
All users that interact with the extension will be automatically registered in the WriteBackExtreme Management Console. Below you will find the steps to create a new user. Note that only an administrator can create a new administrator, or elevate an existing user to administrator. Click on the first image and a slideshow will show up. use your right arrow to see the next image, use your left arrow to see the previous image.
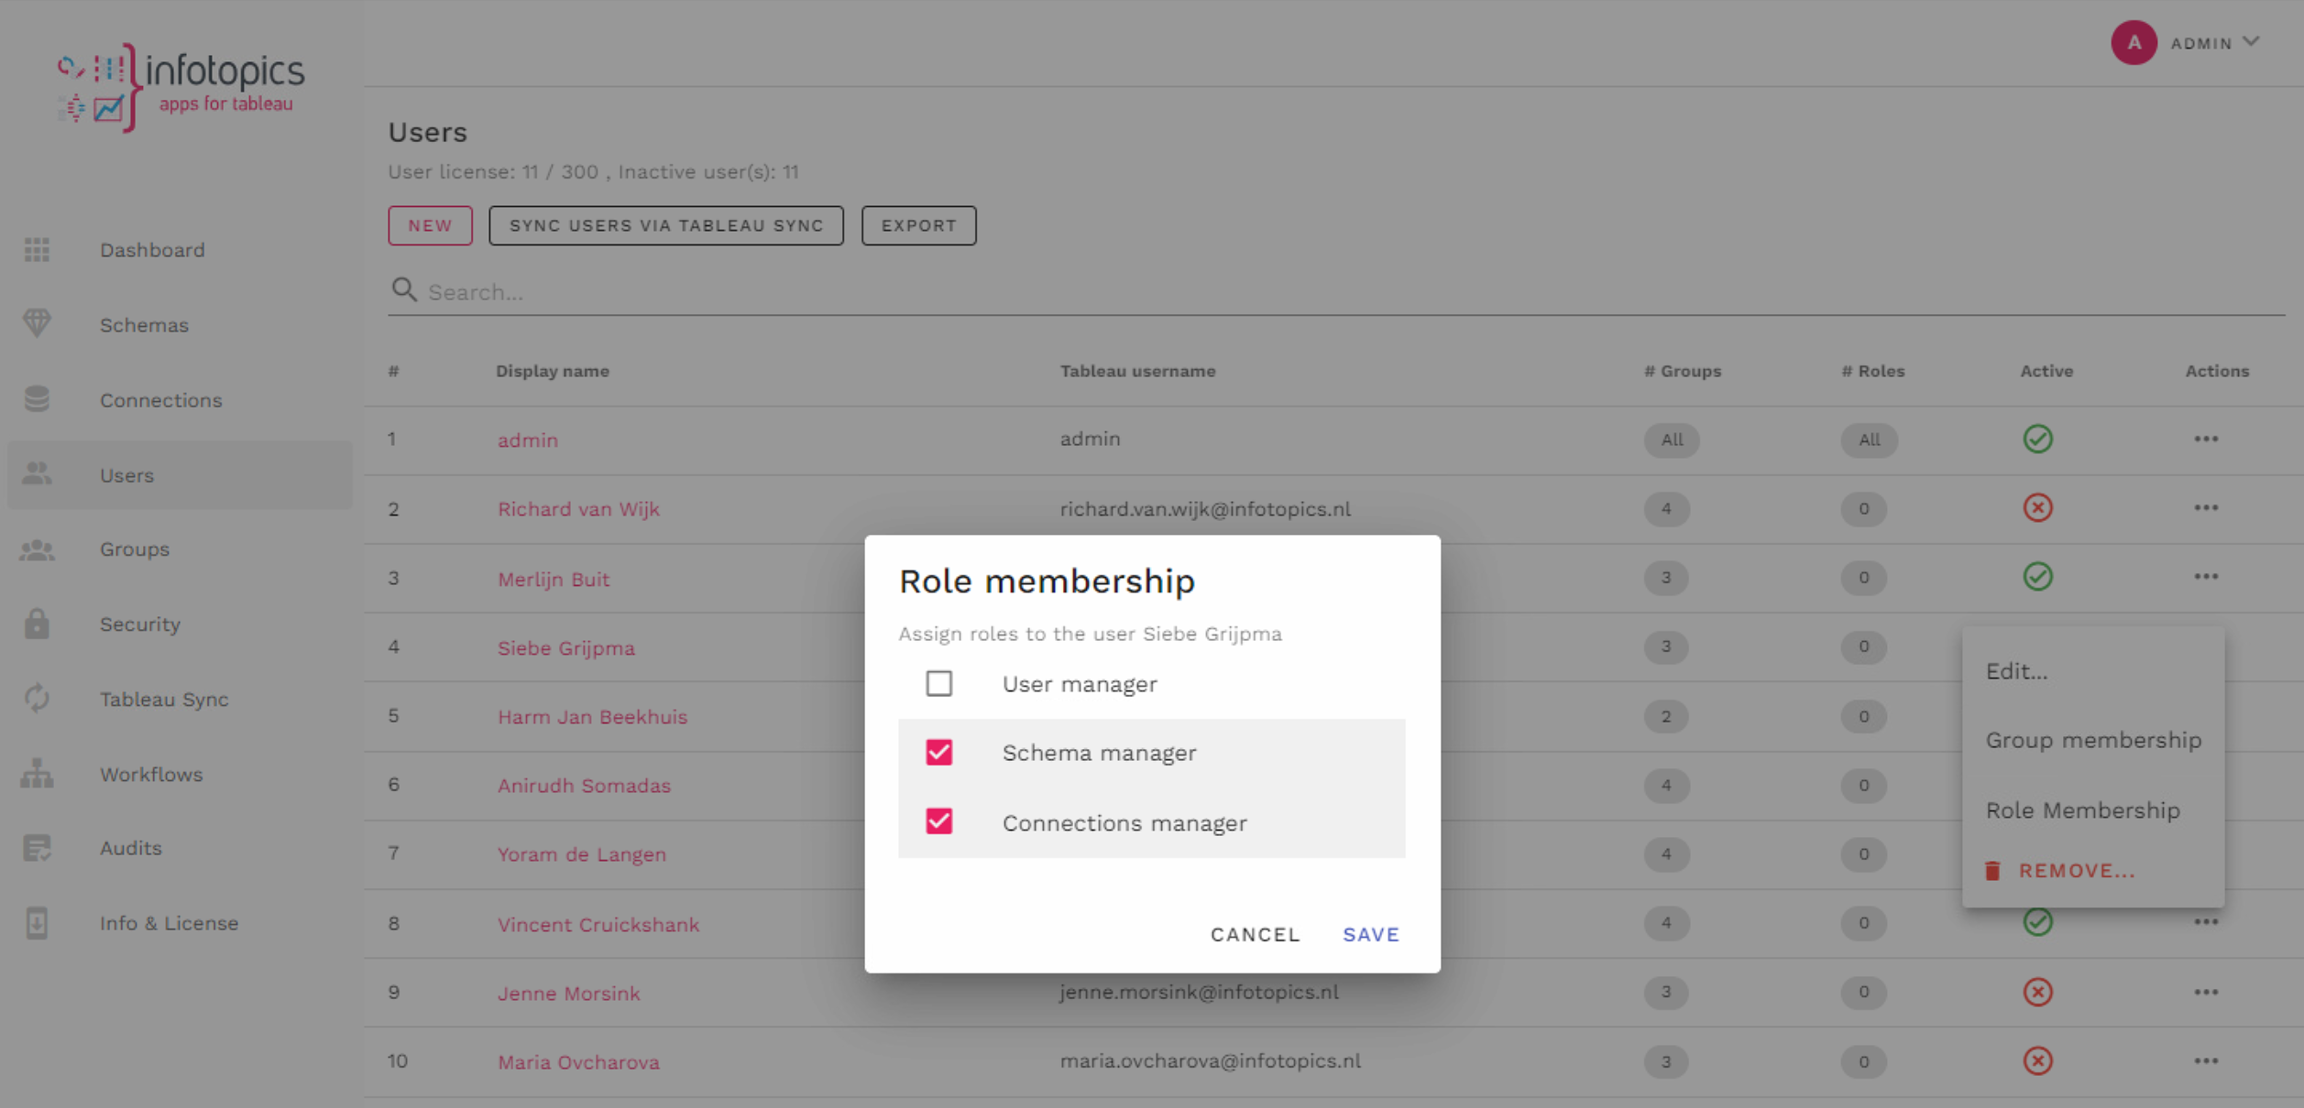
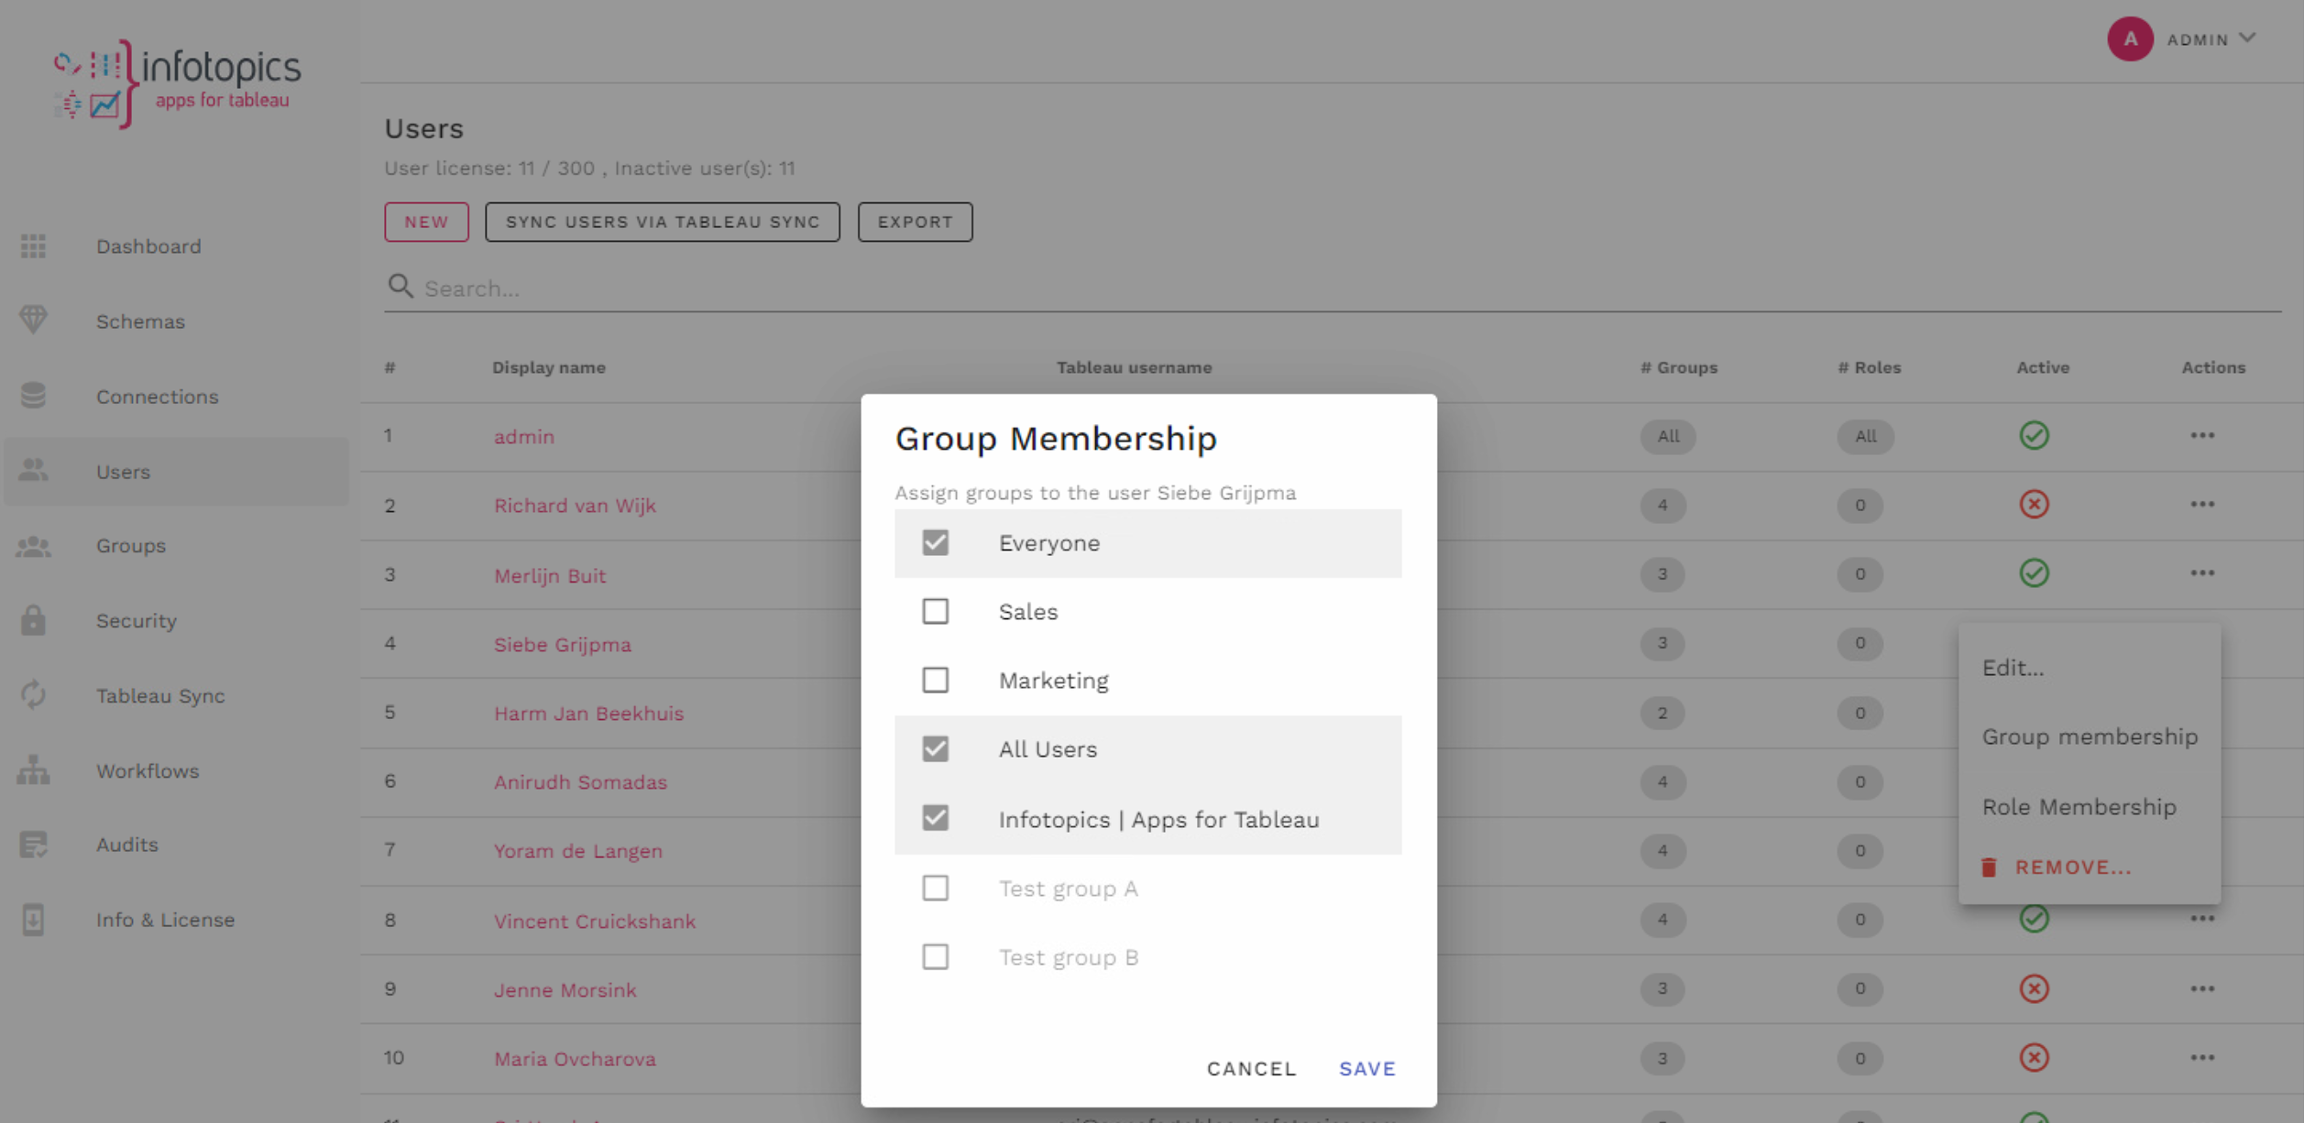
Below you see an animated GIF that illustrates the entire process of creating a new user. You can also edit user properties just by clicking on a user and adjust the properties.
Was this helpful?