
Auth0
Login to auth0
Click
Applicationsin the left menuClick the blue
+ Create applicationbutton on the top right of the pageIn the popup:
Set the name for the application. (Preferably with the name `WriteBackExtreme in it)
Select
Regular web applicationand click the blueCreatebutton
Copy the
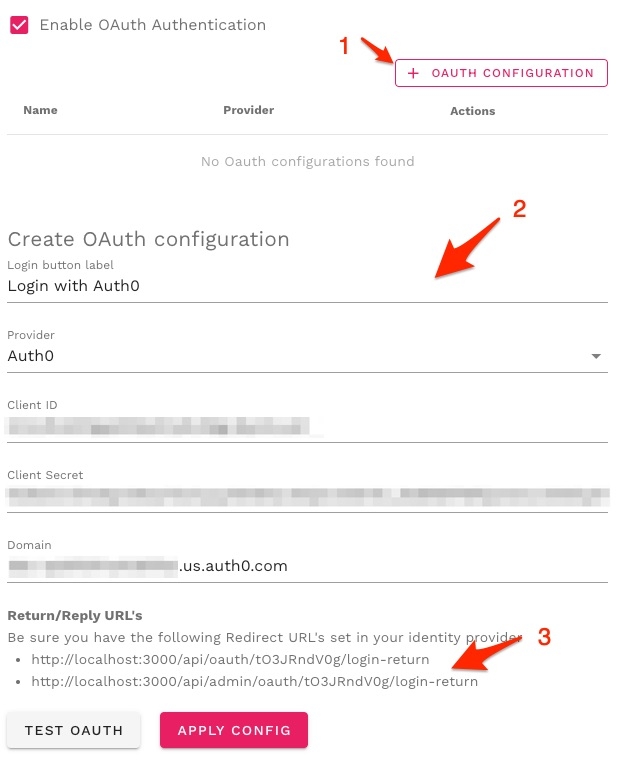
Domain,Client IDandClient SecretOpen the WriteBackExtreme management console.
Go to
SecuritySelect
OAuthClick
+ Add configurationSelect auth0 as provider.
Fill in the
Domain,Client IDandClient Secretyou copied from the auth0 pageCopy the return URL's shown at the bottom.
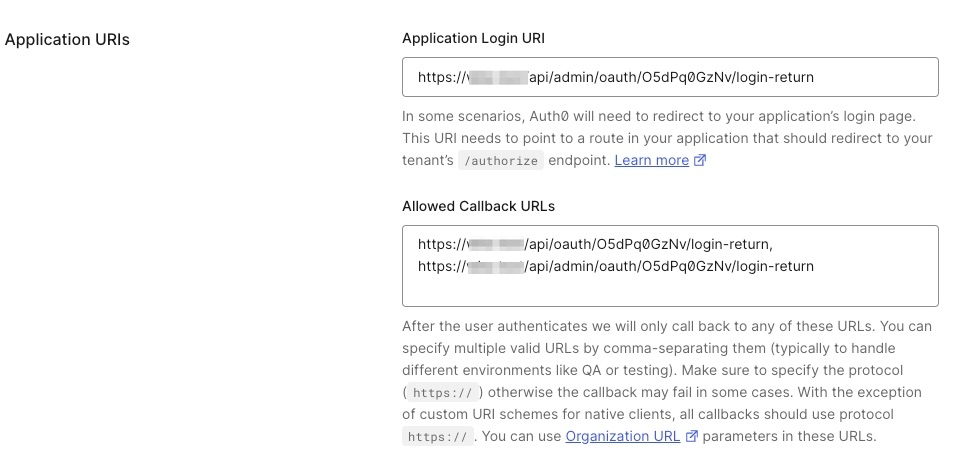
Go Back to your app registration on the auth0 webpage. Scroll down to the section named
Application URIsPaste the first URL into the
Application Login URIfield and theAllowed Callback URLsfield.Paste the second url in the
Callback URLsfield
Click the blue
SaveButton at the bottom of the pageGo back to the management console and click the
Test OAuthbutton.Click the pink
Apply configbutton when the test succeded.