
Schemas
A schema is the collection which contains everything about your use-case. The schema will contain information about the selected database, module, user groups and the configuration of the structure of the write-back table. Whenever you create a new schema you have to choose one of our modules first. Depending on the selected module the setup of your schema will be different.
Create a new schema
To create a schema:
Go to the Schemas section in the Management Console
Click Create New Schema
Follow the steps in the guided wizard:
Choose a module
Select a database connection
Define whether you're using a new or existing table
Add the fields to your schema

🧩 Supported field types
When adding fields to your schema form, you can choose from the following input types:
Single Line Text – For short entries like names or codes
Paragraph Text – For longer free-text comments
Number – For numerical values
Boolean (Yes/No) – For binary selections
Dropdown Select – For predefined options
Date/Datetime – For selecting dates or timestamps
🧹 Choosing the right module
Each module has its own purpose. Here's how to choose the right one for your use case:
Add Data Module
Add data to visuals on a summary data level.
📝 Description: Use this module to allow users to enter new records, such as targets or what-if scenarios. Ideal for dashboards where you don’t need to edit existing data but want to append new insights.
👉 Works well with Tableau Relationships or Blends.
🔍 Use Cases:
Add targets or goals
Forecasting & budgeting
What-if analysis
Add commentary at summarized data levels

Data Correction Module
Display an inline editable table with powerful tools.
📝 Description: Best used when correcting existing records in your dataset. Supports powerful features like bulk edit and interpolation.
⚠️ Requires a 1:1 relationship between Tableau data and the database table (i.e., a unique key like an ID field).
🔍 Use Cases:
Edit typos or incorrect values
Fill missing sensor data
Bulk-edit or interpolate ranges of records
Maintain high data quality by cleaning directly in Tableau

Data Helper Module
Add helper tables in Tableau and use them as optional datasets.
📝 Description: Use this module to manage structured data inside Tableau that doesn't directly impact the primary dataset — like code lists, mappings, or task lists.
🔍 Use Cases:
Store internal codes for filters
Manage survey options
Maintain a to-do list
Replace Excel-based helper tables
Use as a join or relationship source in dashboard

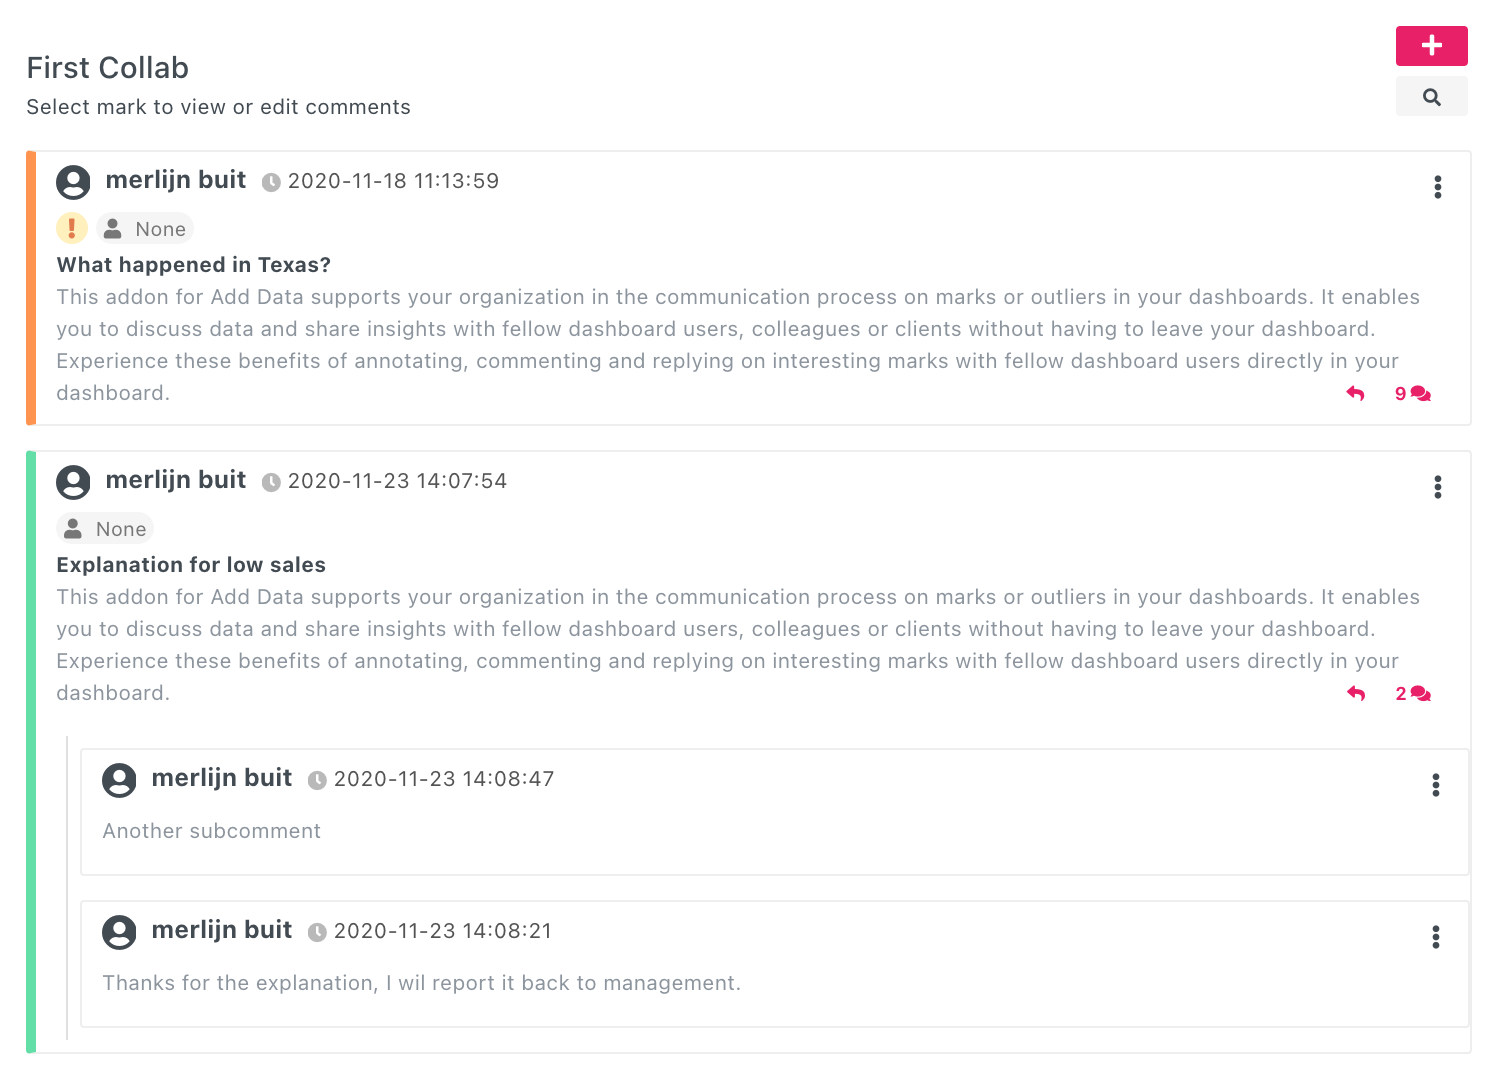
Collaboration (Addon for Add Data Module)
Collaborate, annotate, and comment within your Tableau dashboards.
📝 Description: This is an addon for Add Data, not a separate module. It lets users exchange comments, reply to feedback, and annotate insights without leaving Tableau.
🔍 Use Cases:
Collaborate on data points
Start discussions and track changes
Add context and insights for decision-making
Enable threaded commenting workflows in dashboards
Create schema based on an existing schema
For a data correction schema it is possible to connect to a database table that already exists in your database. The only requirement is that the table has ONE primary key. (Compound keys are not allowed)
To create a schema from an existing table follow these steps:
Create new schema
Select
Data correctionmoduleSelect
Use existing schemaSelect the connection which connects to the database where the table is located
A list of all tables will be presented, Select your table. (when the list is to large, just use Ctrl+F to actiate the search function in your browser)
The new schema wizard will show with all detected columns matched to the field types that WriteBackExtreme uses.
For best compatibility make sure the ID column of the table is a UUID column for example CHAR(36). An example statement for a table could look like:
create or replace MY_TABLE( ID CHAR(36) NOT NULL, COLUMN_1 VARCHAR(16777216), constraint MY_TABLE_ID primary key (ID) );
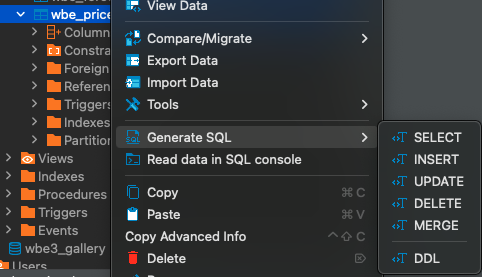
When the management console shows an error about a missing primary key, the best way to verify this is by getting the DDL statement or Create table statement from a third party database management tool like DBeaver. This is the easiest way since every database has it's own way of retrieving the primary key information.
This Create schema from existing schema feature can be disabled by an administrator via the advanced settings page.
When there is an error in retrieving the tables or the details of a table, the error log will probably show the true cause. Go to Info & license -> Click on system logs and click the laravel log of today to see the details of the error.
Last updated
Was this helpful?