
This page describes the setup procedure to setup an oAuth client on Google
Go to APIs & Services
Click on
Credentialsin the left menuClick on the
+Create credentialsbutton at the top of the screenSelect
oAuth Client ID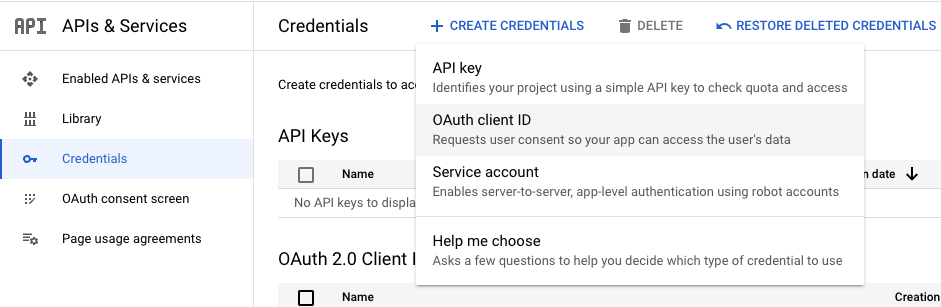
Select
Web Applicationas the Application type.Enter a name (For example WriteBackExtreme).
Do not add redirect URIs yet, this will come in a later stage
Push the blue Create button at the bottom. A popup will show that contains the Client ID and secret.
Go to the WriteBackExtreme Management console. Select security in the left menu, click oauth and hit the red
+Auth configurationbutton.Set a button label.
Select Google as provider
Insert the Client ID and secret you got from Google
When you entered the clientID and secret, you will see the Return URL's underneath the form. Copy both URLs. you need to add these to the your Aouth app in Google.
Go back to the Google console and click the oAuth app you created. Hit The
+ADD URIbutton in theAuthorized redirect URIssection. Insert the first URL.Do the same for the second URL.
Hit the blue save button at the bottom.
Go back to the management console and hit the `Test OAuth` button. A popup will open to simulate a login.
After the test is complete you can hit the
Apply configbutton to save your configurationDone!
Was this helpful?