Windows
Before you start, be sure to read the Databricks ODBC page
There are multiple ways to authenticate. We will describe the username/password authentication in this example.
This setup is to configure Databricks with DSN in WriteBackExtreme. You can also configure Databricks without using DSN. For this follow step 1 and move on to step n.
Be sure you have the latest Simba Spark ODBC driver installed. (2.8.2 or higher, release from June 4th 2024)
In ODBC Administrator, Go to the `User DSN` tab and press the `Add` button.
Select the Simba Spark ODBC Driver

Fill in at least these fields:
Data source (this is the key you define to identify your connection, this is the DSN name you need when creating the connection in the management console)
Host(s)
Port: 443
Database
Mechanism: User Name and Password
User Name: token
Password (this would be your personal access token)
Thrift Transport: HTTP
Select the HTTP Options button
Fill in your HTTP Path

Click the SSL Options button
Check the Enable SSL Option

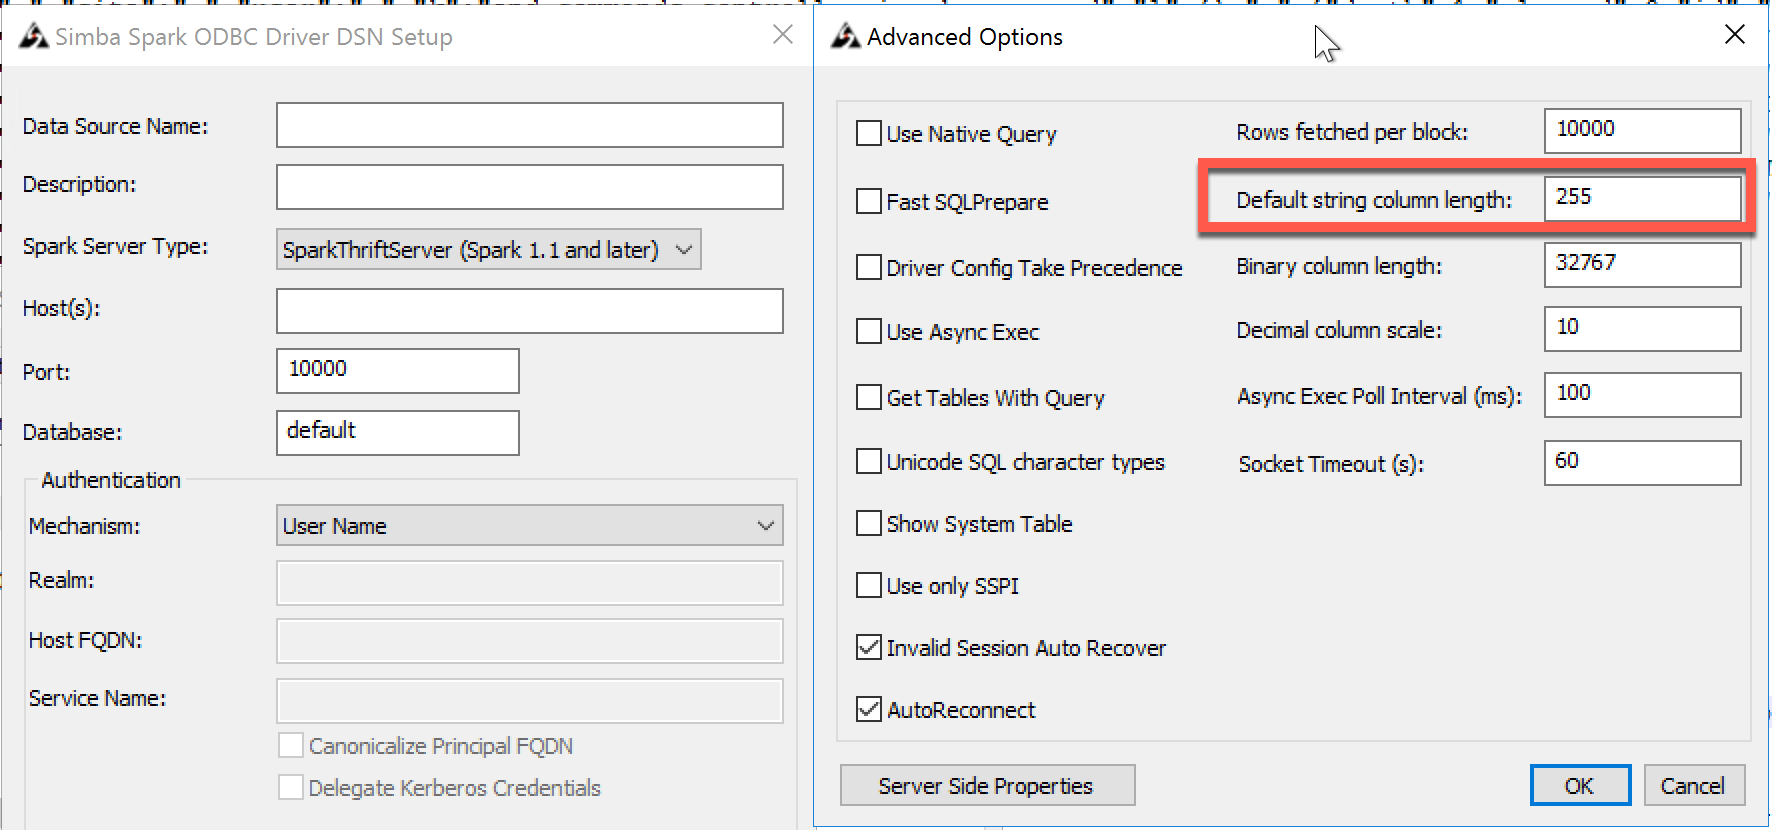
Go to Advanced options and set the Default String Column length to 4000

Click the Test button to confirm that connection is successful.
Click the OK Button to save the changes
Now it is time to create a connection in the management console.
Create a new connection in the management console and select Databricks
Select use DSN.
If you don't use DNS? You have to fill the driver name.Use the name found in the odbc manager drivers. Most of the times the driver is: Simba Spark ODBC Driver.
the DSN name is the name you set in 5a
Fill the other fields as well
Username: Token
Hit Test connection
Hit Save connection
Done!
Last updated
Was this helpful?
