
OKTA Example
Follow the next steps to get your SAML configuration from OKTA:
Log in to your Okta Admin Console.
Navigate to the "Applications" tab.
Click on the desired application for which you want to obtain the IdP EntityID.
In the application settings, go to the "Sign On" tab.
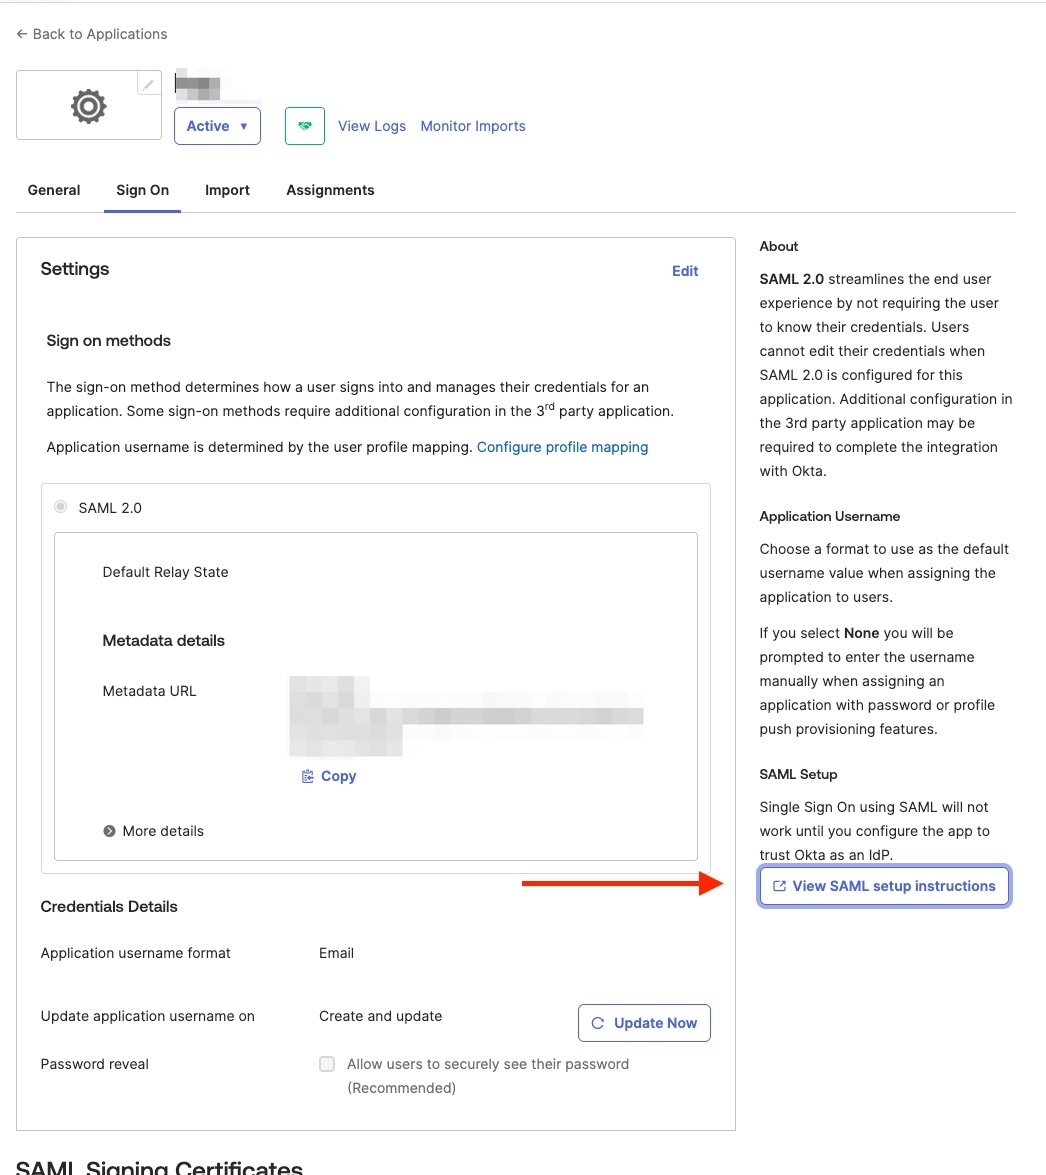
At the right click the `View SAML setup instructions` button
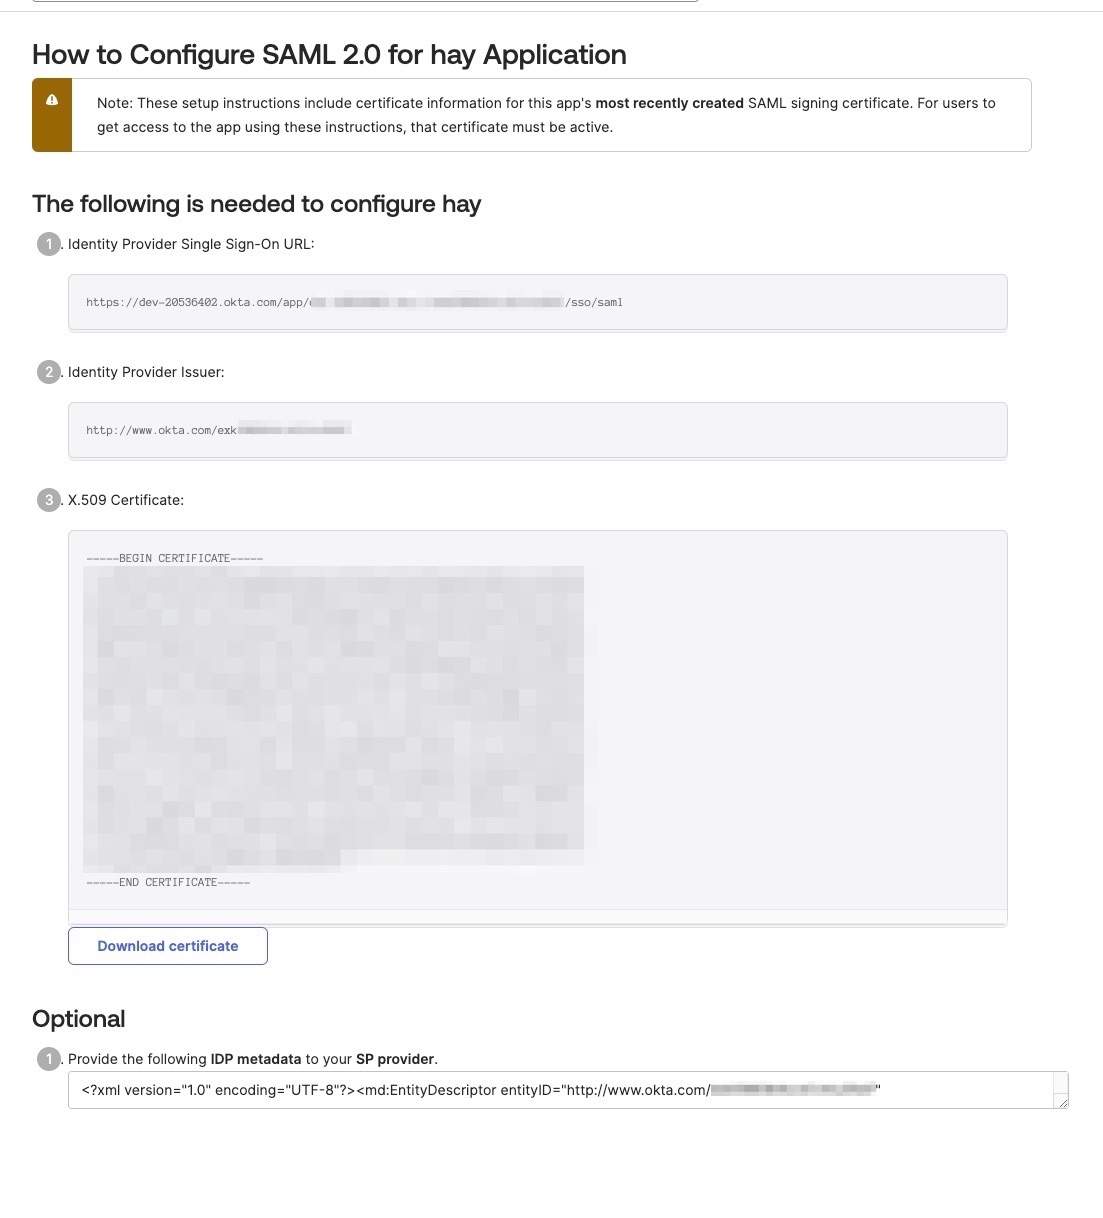
On this page you can find your Idp Identifier, login url and certificate.
Go to the management console of WritebackExtreme.
Select Security in the menu at the left
Select Single sign On
Insert the information you got from step 5
At the bottom of the page you can find the information OKTA needs to connect to WriteBackExtreme. Copy the SP Entity ID and the two return login URL's.
Go to the OKTA Admin console to your Application. On the General tab in the SAML Settings section, click on edit at the top right. Go to the Configure SAML tab. (You should now see the screen displayed in the screenshot below)
Fill the Management console return login URL in the Single Sign-on URL Field.
Fill the SP Entity ID field
Click on `Show Advanced settings`. Fill both the extension and management return URL's at Other Requestable SSO URL's
Optionally you can set Attribute statements like shown in the screenshot below.
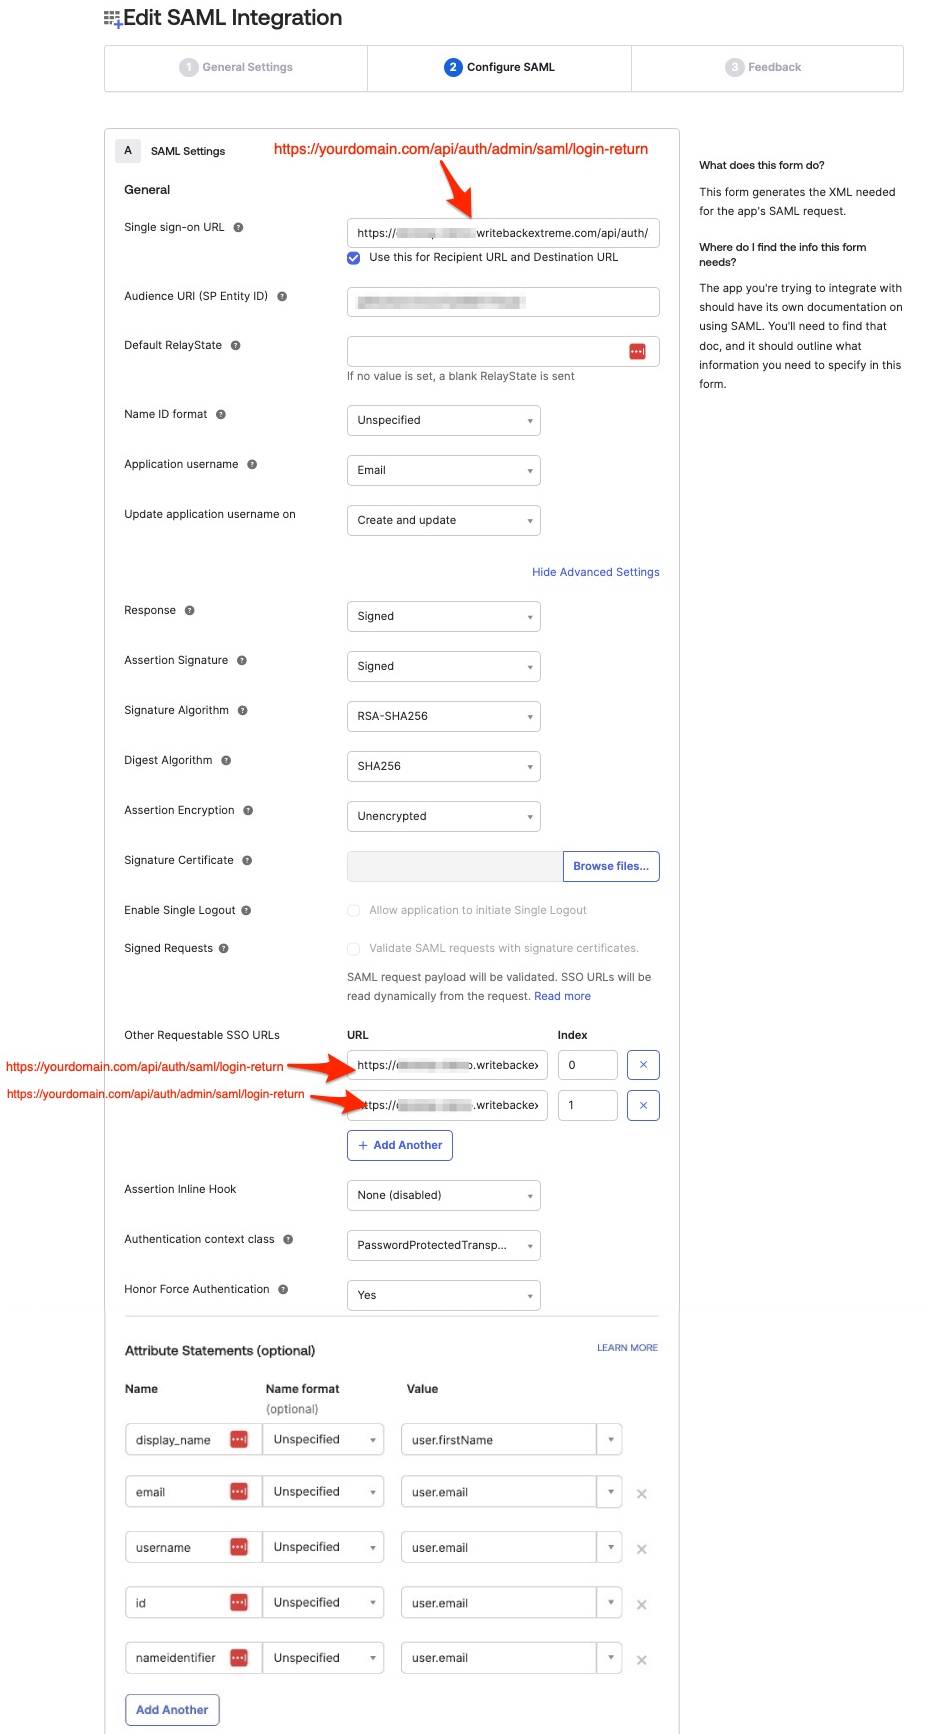
In the example above we use e-mail address for the username field since that is commonly used. This value should match the field that is used as username in your tableau server.
When there is any error while setup we advise to use the Chrome browser plugin SAML tracer to see what data is sent to WriteBackExtreme. Also https://samltool.io/ is a good tool to check the SAML payload.
Was this helpful?