
Recipients
When importing recipients, the options are:
Manually searching for an existing recipient within other mailing lists
Creating a new recipient with a name, email address, and (optional) filters
Importing a list of recipients based on a CSV
When importing recipients, the CSV format should be:
id;name;email;sites;filter_Region;filter_Department;placeholder_NAME;placeholder_CITY
Note that the filters and placeholders are prepended with filter_ or placeholder_, respectively.
Sites are an array of site IDs, for example: [1, 2]
When importing, incorrectly formatted rows, such as an invalid email address, will be bounced. A prompt will allow you to download the incorrect rows, edit them accordingly, and import them again.

The Recipients tab shows an overview of existing recipients and allows to edit individual recipients. To add or bulk edit recipients, go to the Mailinglist tab and add them to the desired mailing list.
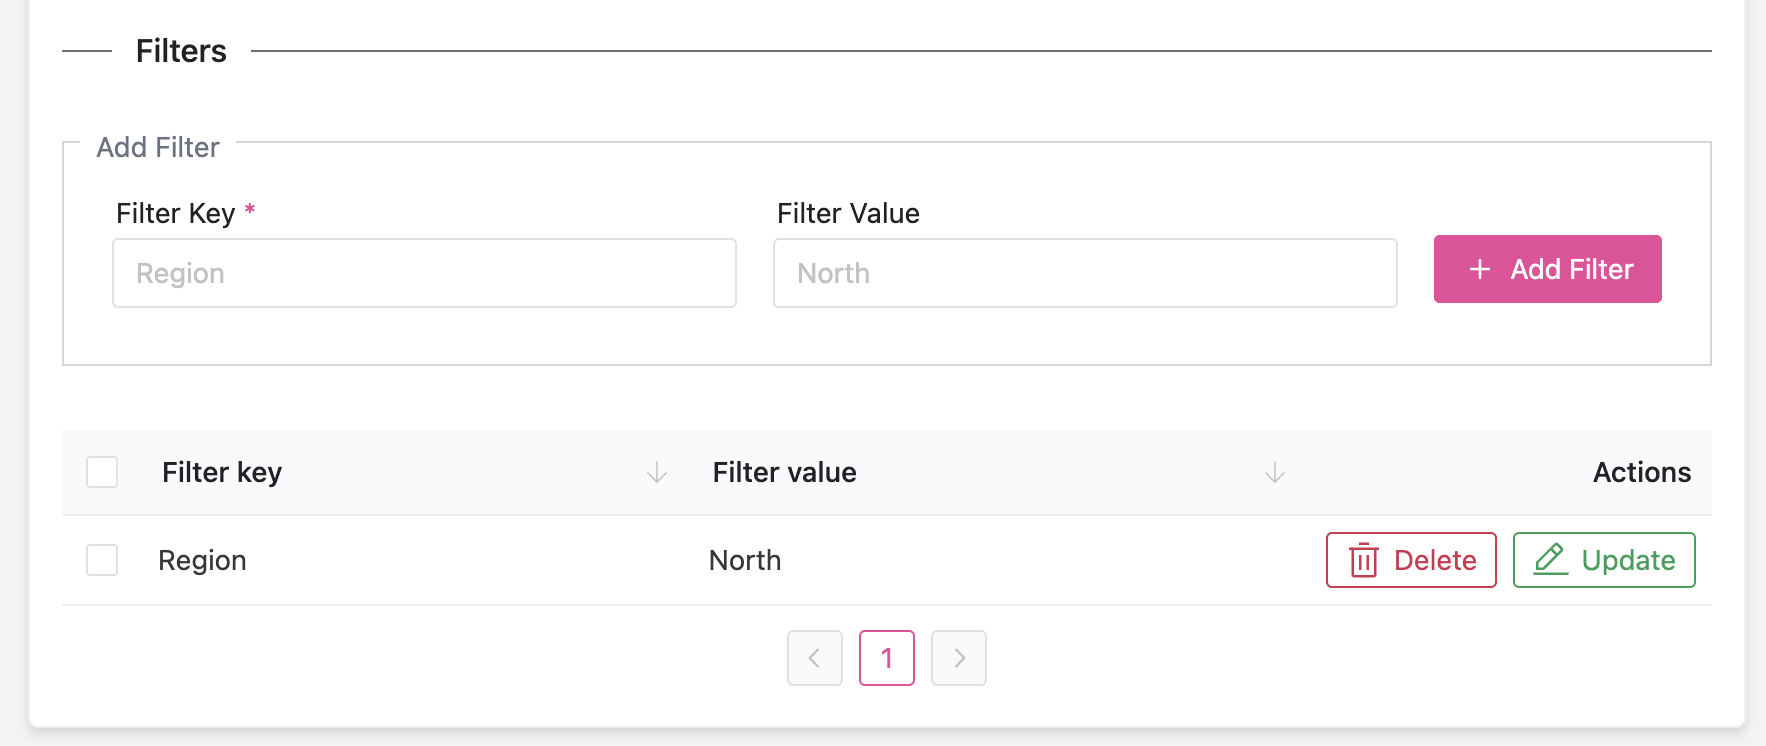
Filtering
Filtering can be done on multiple levels, at multiple stages of your MailScheduler configuration, and in the Dashboard itself by setting your workbook filter to “All unselected.” Here, you can set what values should be used for the personal filters you specify in the task or view.
Filters are case-sensitive.
See the filtering section for more details.
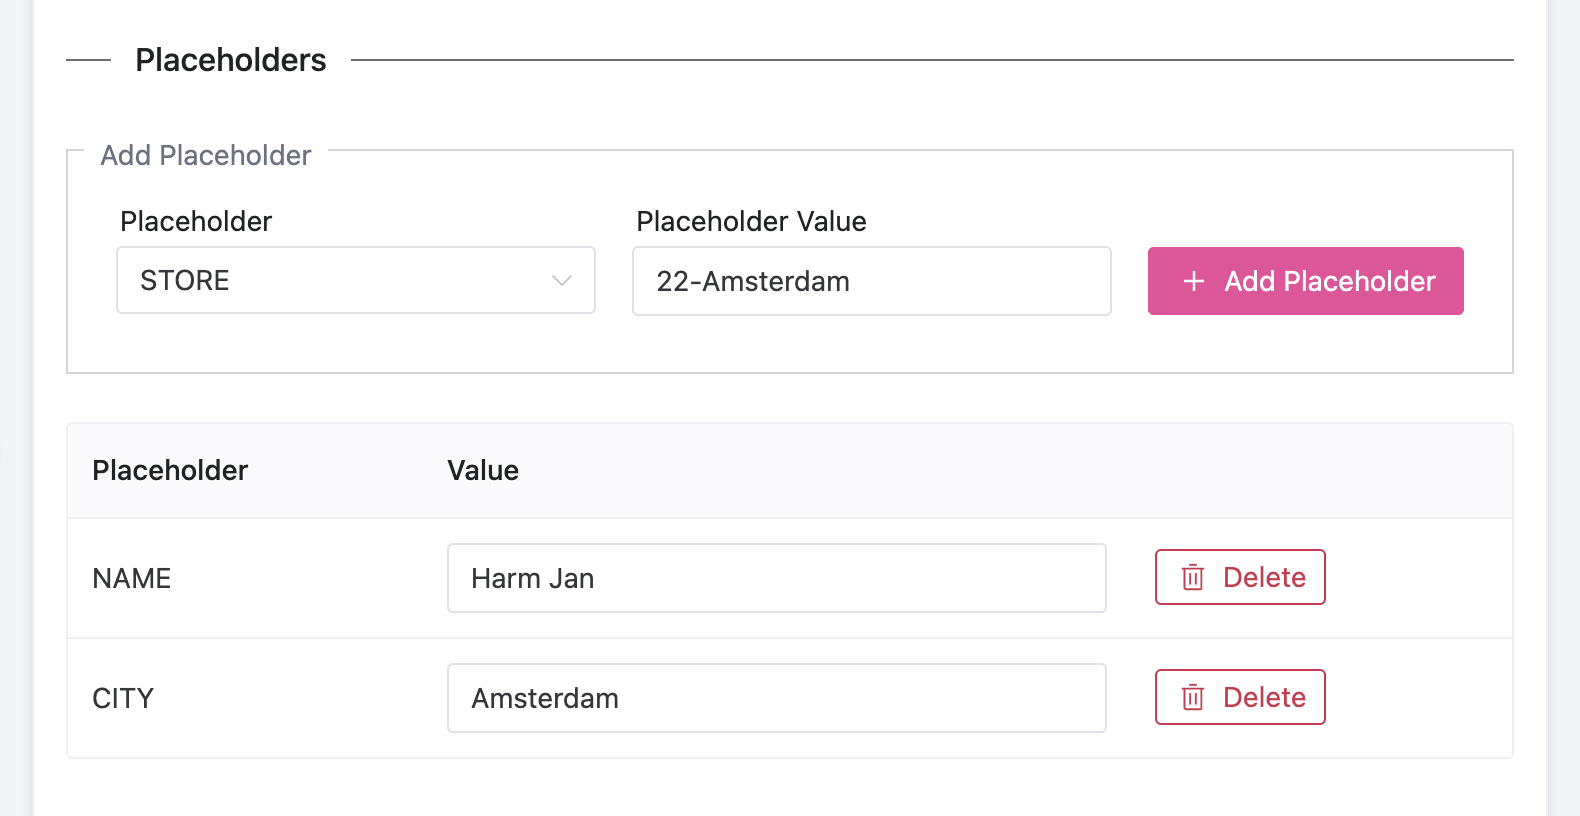
Placeholders
You can use user-specific values to personalize an email, subject, or filename. After configuring the placeholders in the config, you can assign them here. If no value is specified for some placeholders, the default will be a fallback.
Last updated
Was this helpful?