
Trigger-based schedules
What is a trigger-based schedule?
Schedules can be executed based off of triggers. These triggers can either be sent from Tableau, when a workbook or datasource extract has finished, or executed with a custom implementation.
Adding a new trigger-based schedule
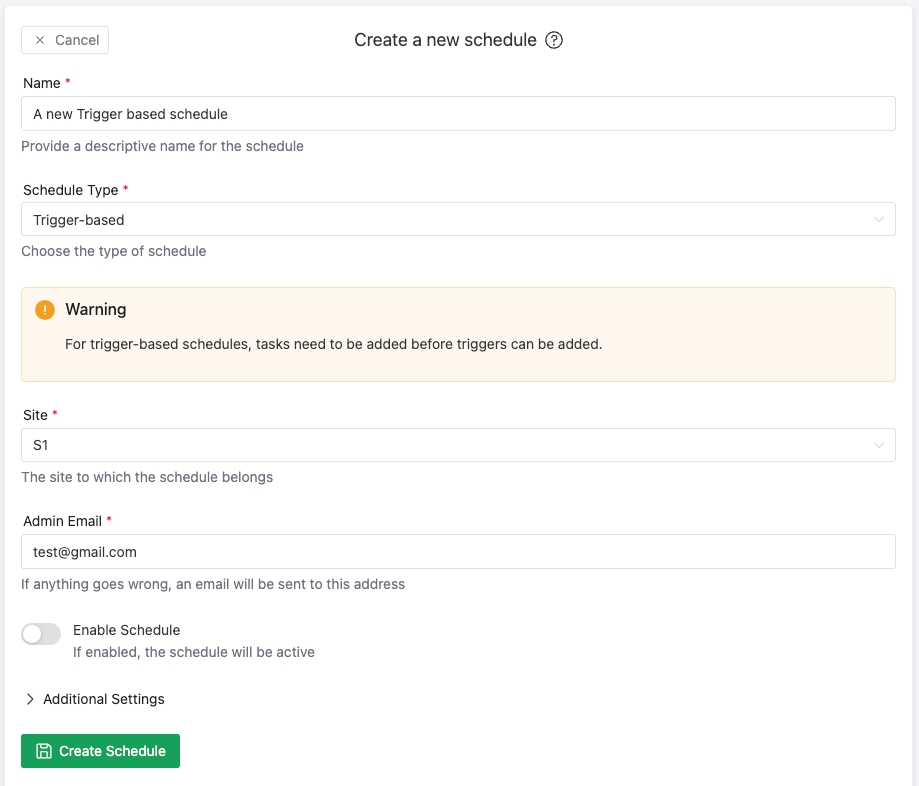
When creating a schedule, you can now opt to create a "Trigger-based" schedule. Select this option, and then press the 'Create Schedule' button.
After the schedule is created, you will need to first add tasks before you can define the triggers. Go to the Tasks page, and add a view as normal.
With at least one defined view, go to the Triggers tab of the schedule:
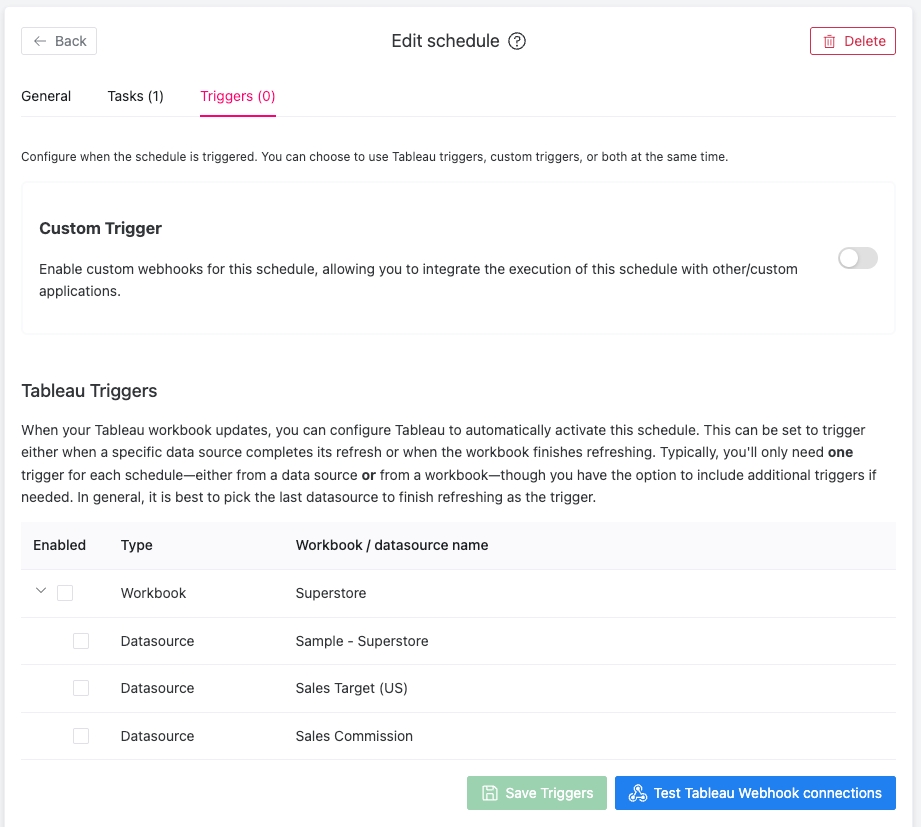
Here, you can decide what will trigger your schedule. This can be a custom integration, Using custom triggers, or Tableau triggers. For tableau triggers, you usually only select either a workbook to trigger the schedule, or a datasource. If you have a bunch of datasources that refresh one after the other, only pick the last one to finish. This way, you know you will get an up-to-date view.
When you have selected how you want the schedule to be triggered, you can press the 'Save Triggers' button. Afterwards, you can press the 'Test Tableau Webhook connections' button to test if the connection from Tableau to your server is successful.
Using custom triggers
To use custom triggers, your need to send POST requests to yourmailschedulerinstance/api/webhooks.
The format of the body needs to be as follows:
If the schedules are enabled, this will trigger their execution.