Run as a service on Windows
The easiest way to have the extension started automatically as a service is to create a task in Windows Task scheduler. The trigger of the task must be configured to “System boot” and it is best run under System Credentials. Below the steps to follow.
Follow this video for a full tutorial:
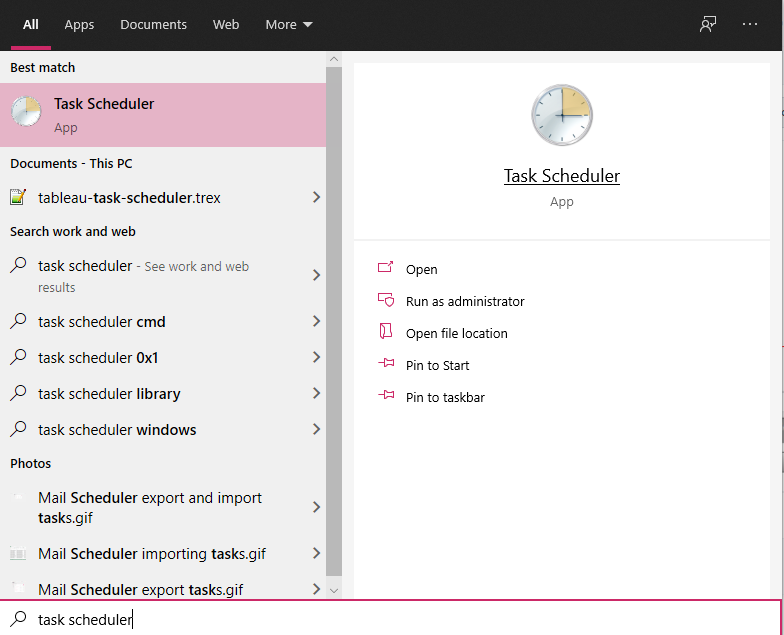
1. Start windows Task Scheduler
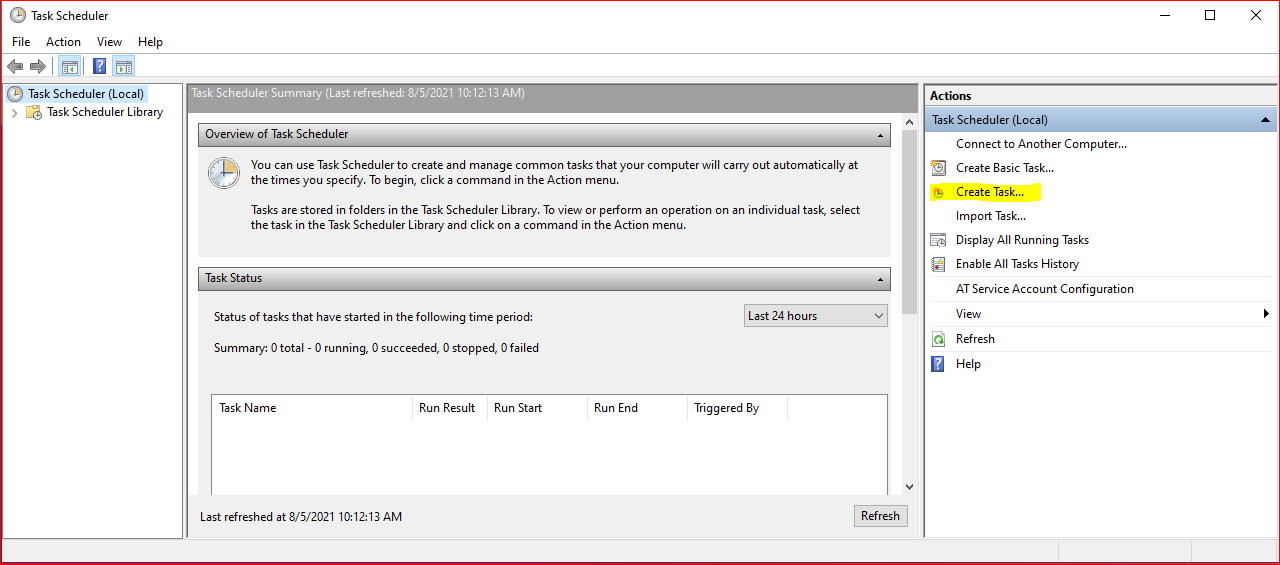
2. Create a new task
3. Enter the general task information
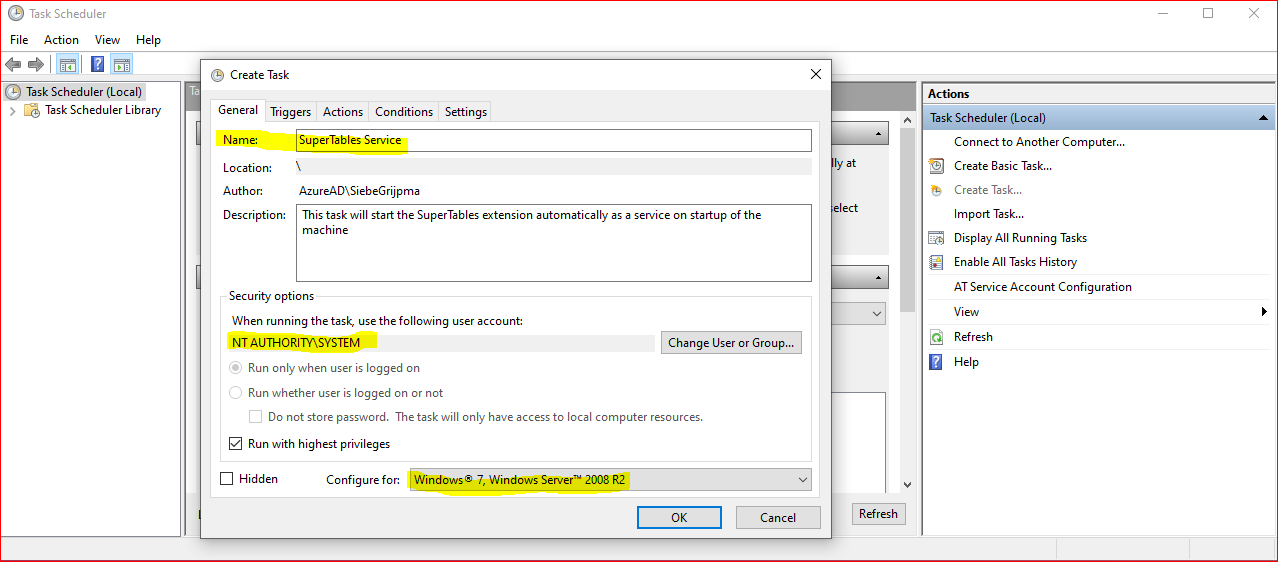
Name the task with a reference to the extension, you will start with this task
Set SYSTEM user account to execute this task. It is important to use an account with privileges to start services
Check what version suits your system best (Windows Server)
4. Set trigger for the task to be executed
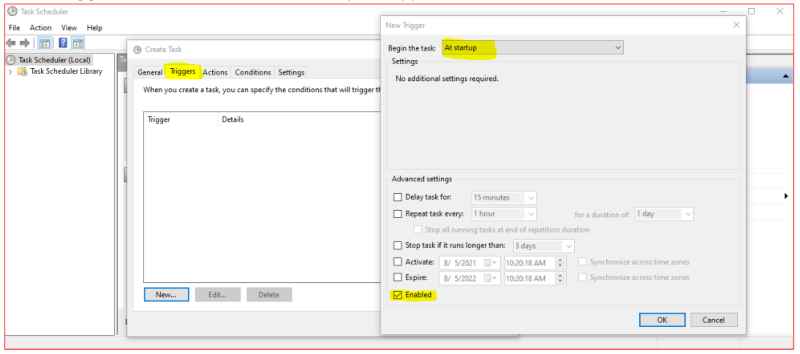
Add a new
triggeron the TASK pane.Select the trigger “At Startup”.
Make sure the trigger is enabled.
5. Set the action to start the program
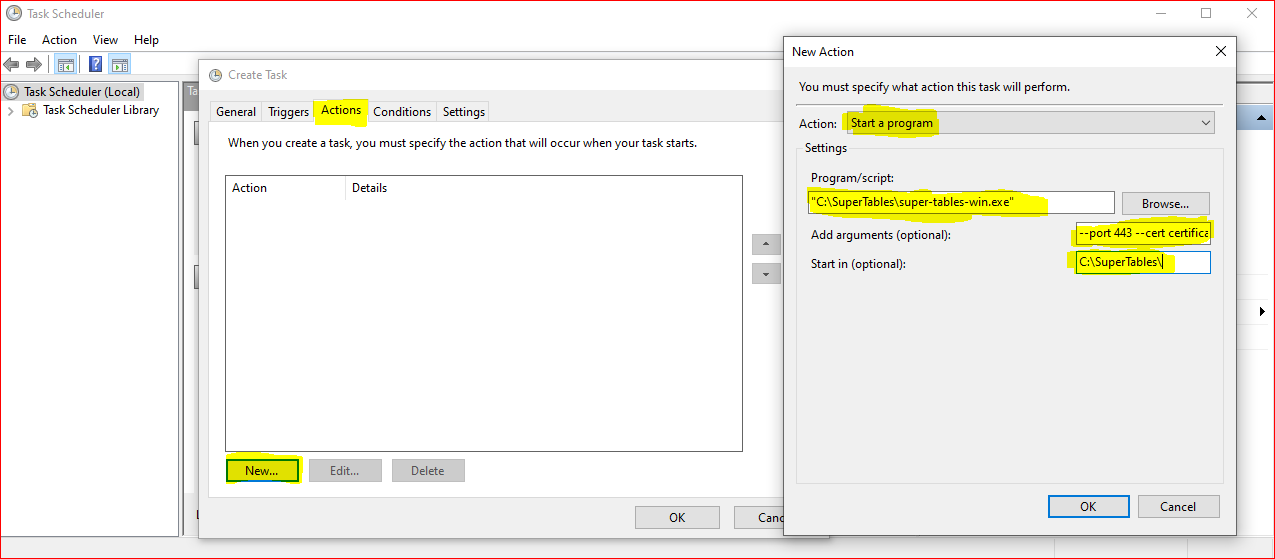
On the
Actionstab selectNew…Set your action to type
Start programSelect the binary file of your extension as the
Program. In this example it isC:\SuperTables\super-tables-win.exe”. Make sure to include the entire path.Optional when using
config.yml`:Set your Arguments for the extension server (port number and certificate details). In this example:--port 443 --cert certificate.crt --key certificate.key(double dashes without space in between)Set the
Start infolder. This is very important for the service to start correctly. It is the path where the binary file/program is located. In this example:C:\SuperTablesPress OK to store your
Action.
6. Set proper conditions for task
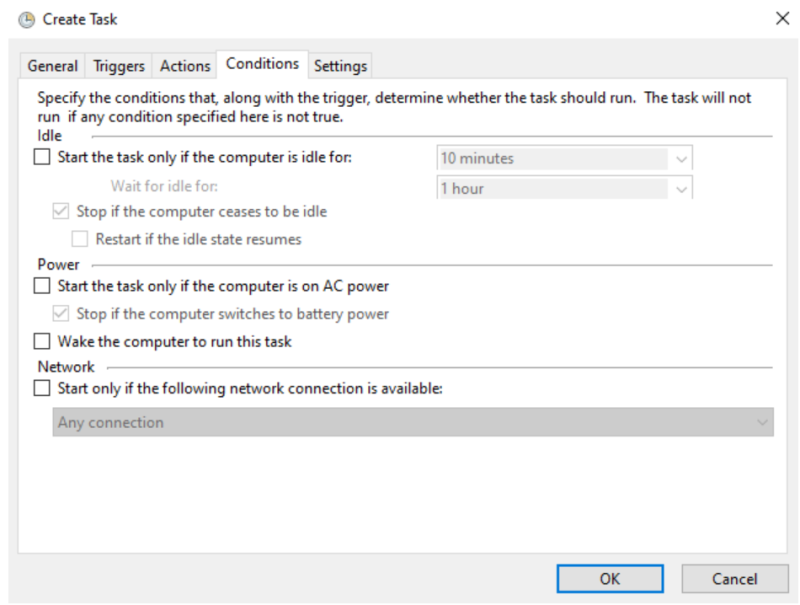
Make sure the task will always be executed (battery or AC power)!
7. Set extra settings
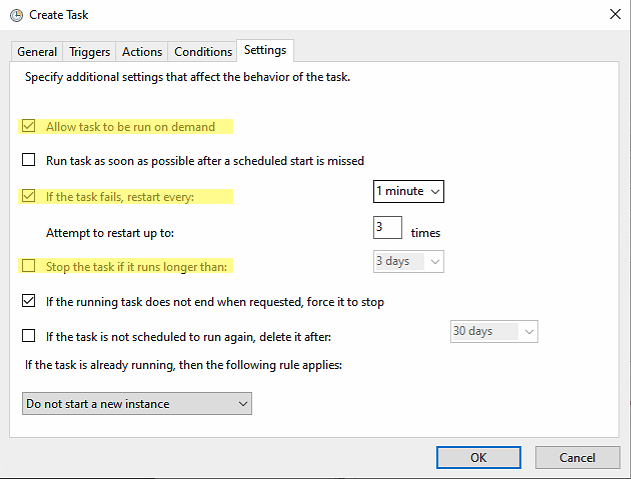
Make sure the task will remain running.
Make sure the task can be started on demand.
Make sure the task will restart automatically on failure.
8.Manually start the task
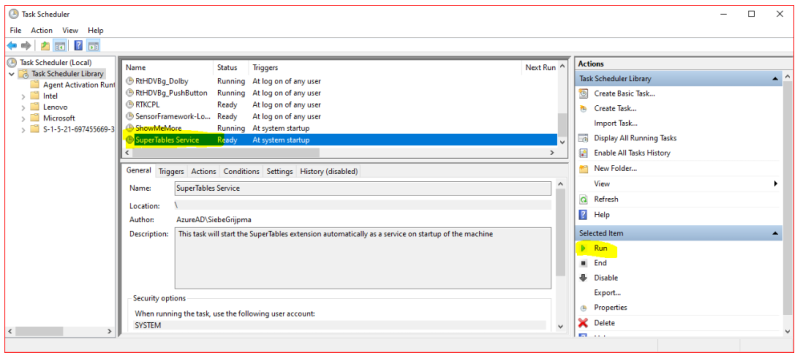
Once you saved the newly created task select it in the list of tasks
Click the
Runbutton on the right panel to start the new tasThe status of the service will change from
ReadytoRunningjust like the ShowMeMore task in the screenshot.
Was this helpful?
