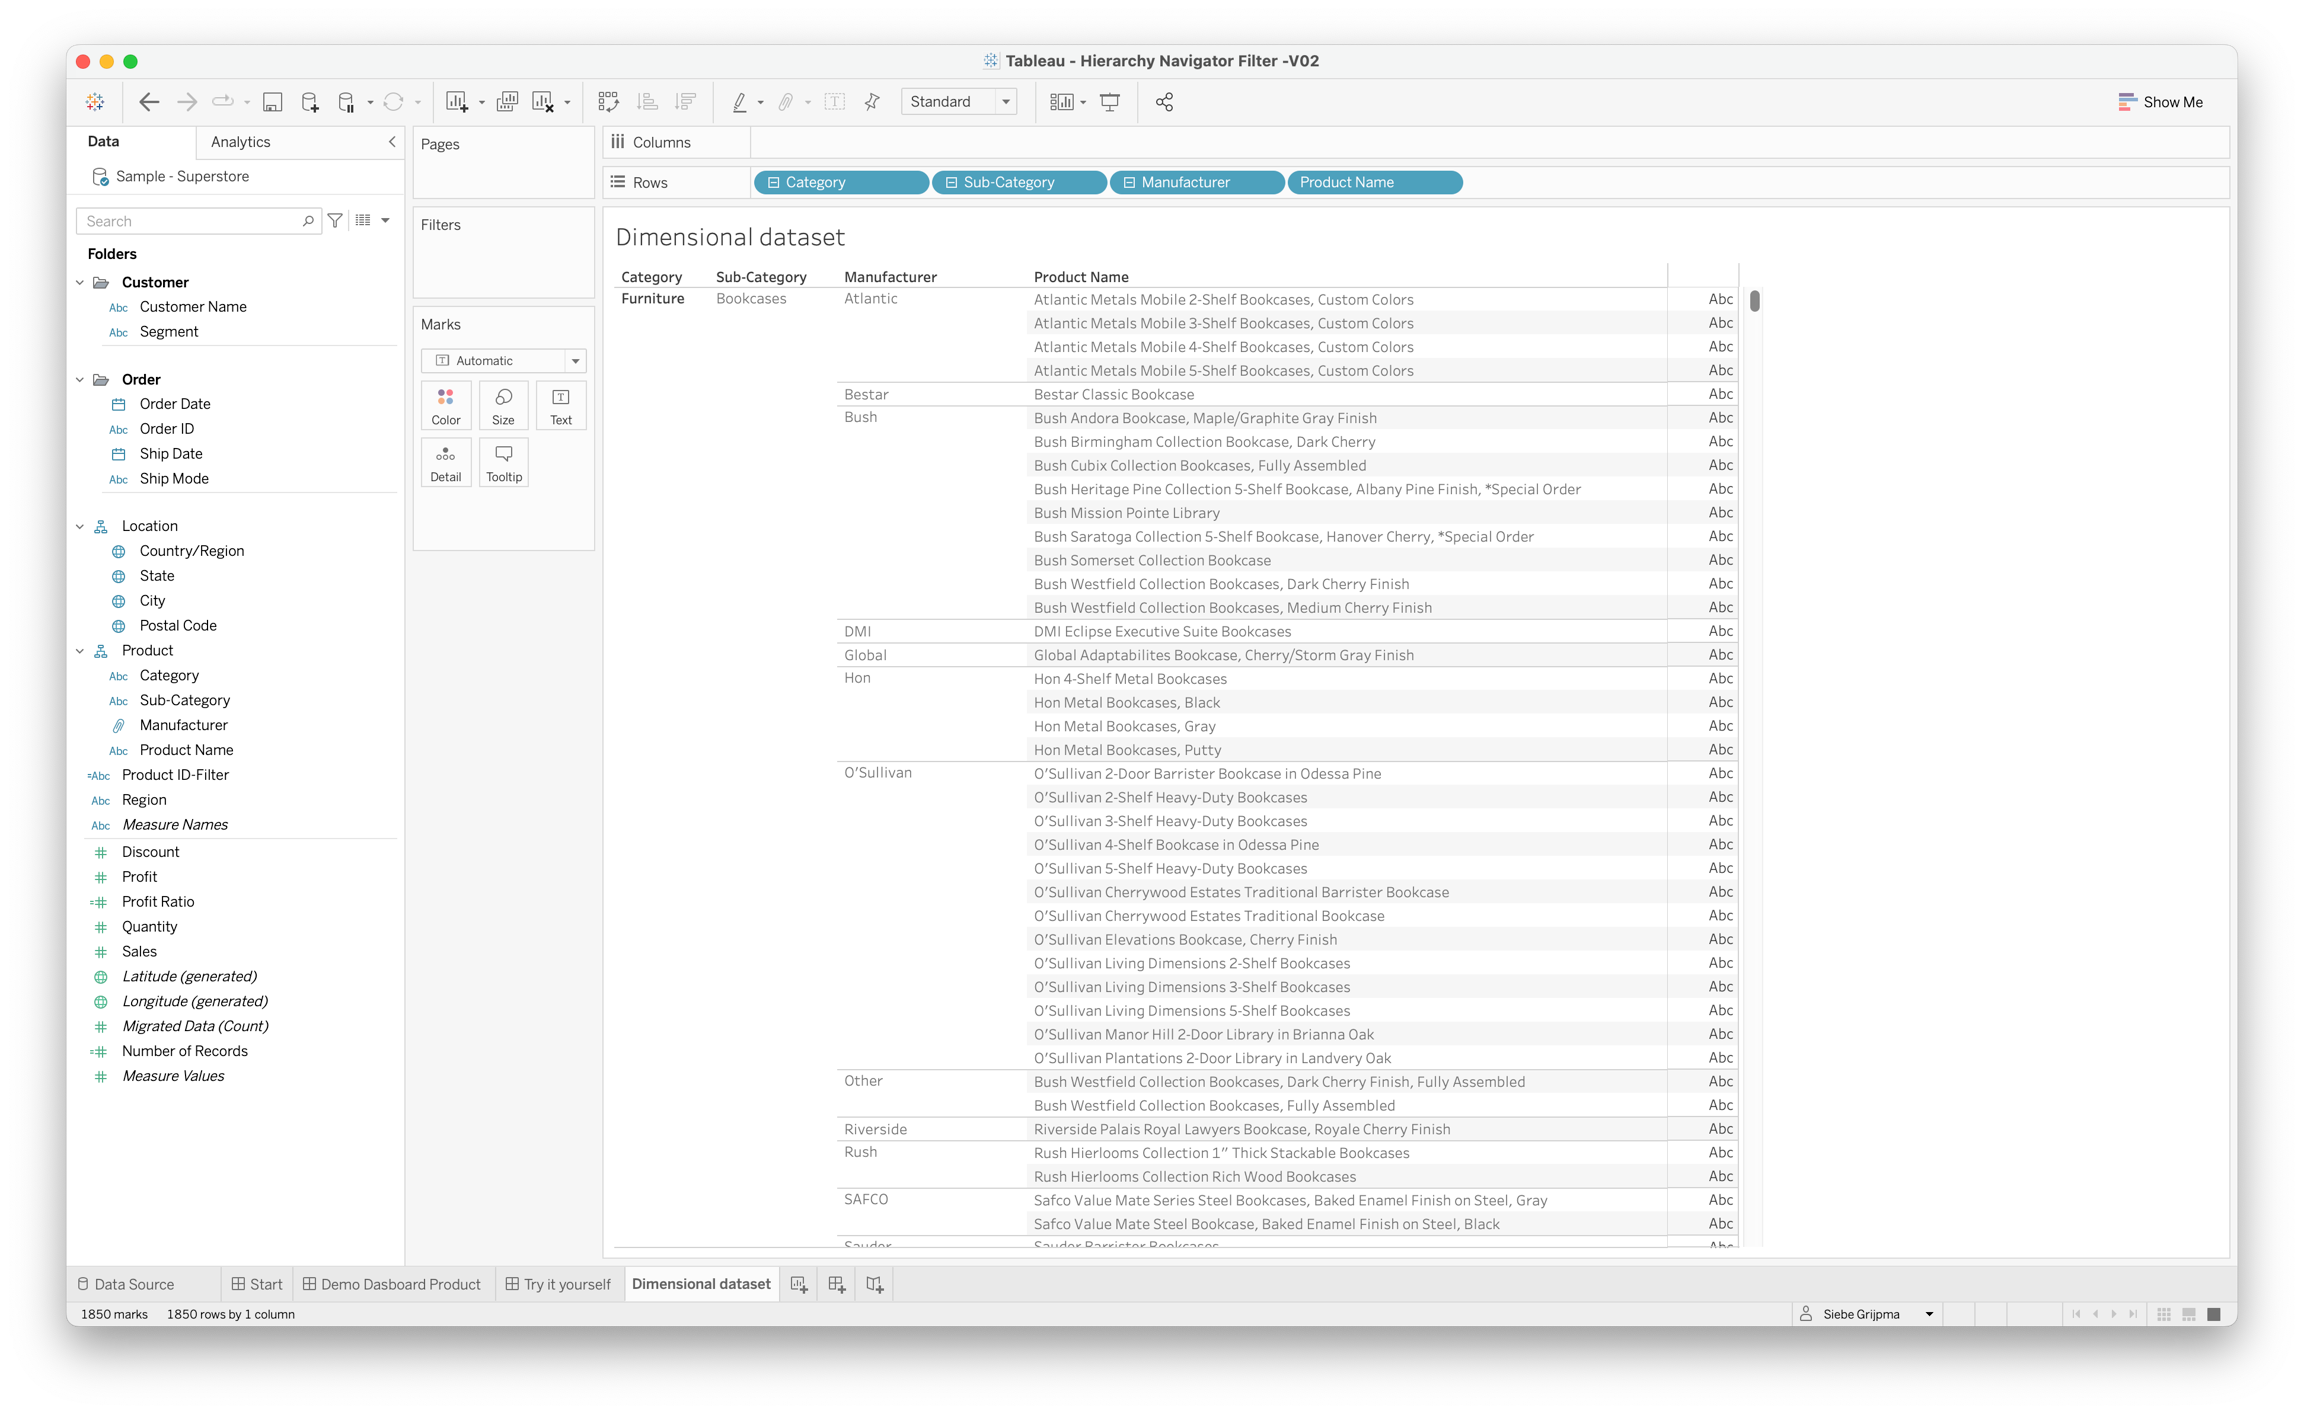
Dimensional dataset
As indicated above, the HierarchyFilter supports a Dimensional dataset. In this example, we use Product structure from the SuperStore dataset which is already available as a hierarchy. The image shows an example of the Product structure hierarchy in the SuperStore dataset. The dimensions are available on a row level in your data.
Global overview for dimensional datamodel
When working with a dimensional dataset, the global process of getting started with the HierarchyFilter extension for Tableau consists of the steps listed below. After this summary, we will explain each step.
Create your hierarchy datasheet
Define your hierarchy structure
Create parameters for extra dashboard interactivity
Configure the extension
Hide your hierarchy datasheet
Interact with your dashboard
Create your hierarchy datasheet
It is not necessary to have your data source structured in Tableau Hierarchies! The image shows an example of the Product structure hierarchy in the SuperStore dataset, you can also use your dimensional dataset of course without setting up a Tableau Hierarchy upfront. The dimensions are available on a row level in your data, just add them to your hierarchy datasheet as shown in the example. Don’t worry about formatting, this sheet is necessary on your dashboard but will be hidden once we set up the extension properly.
Create your hierarchy structure in a calculated field
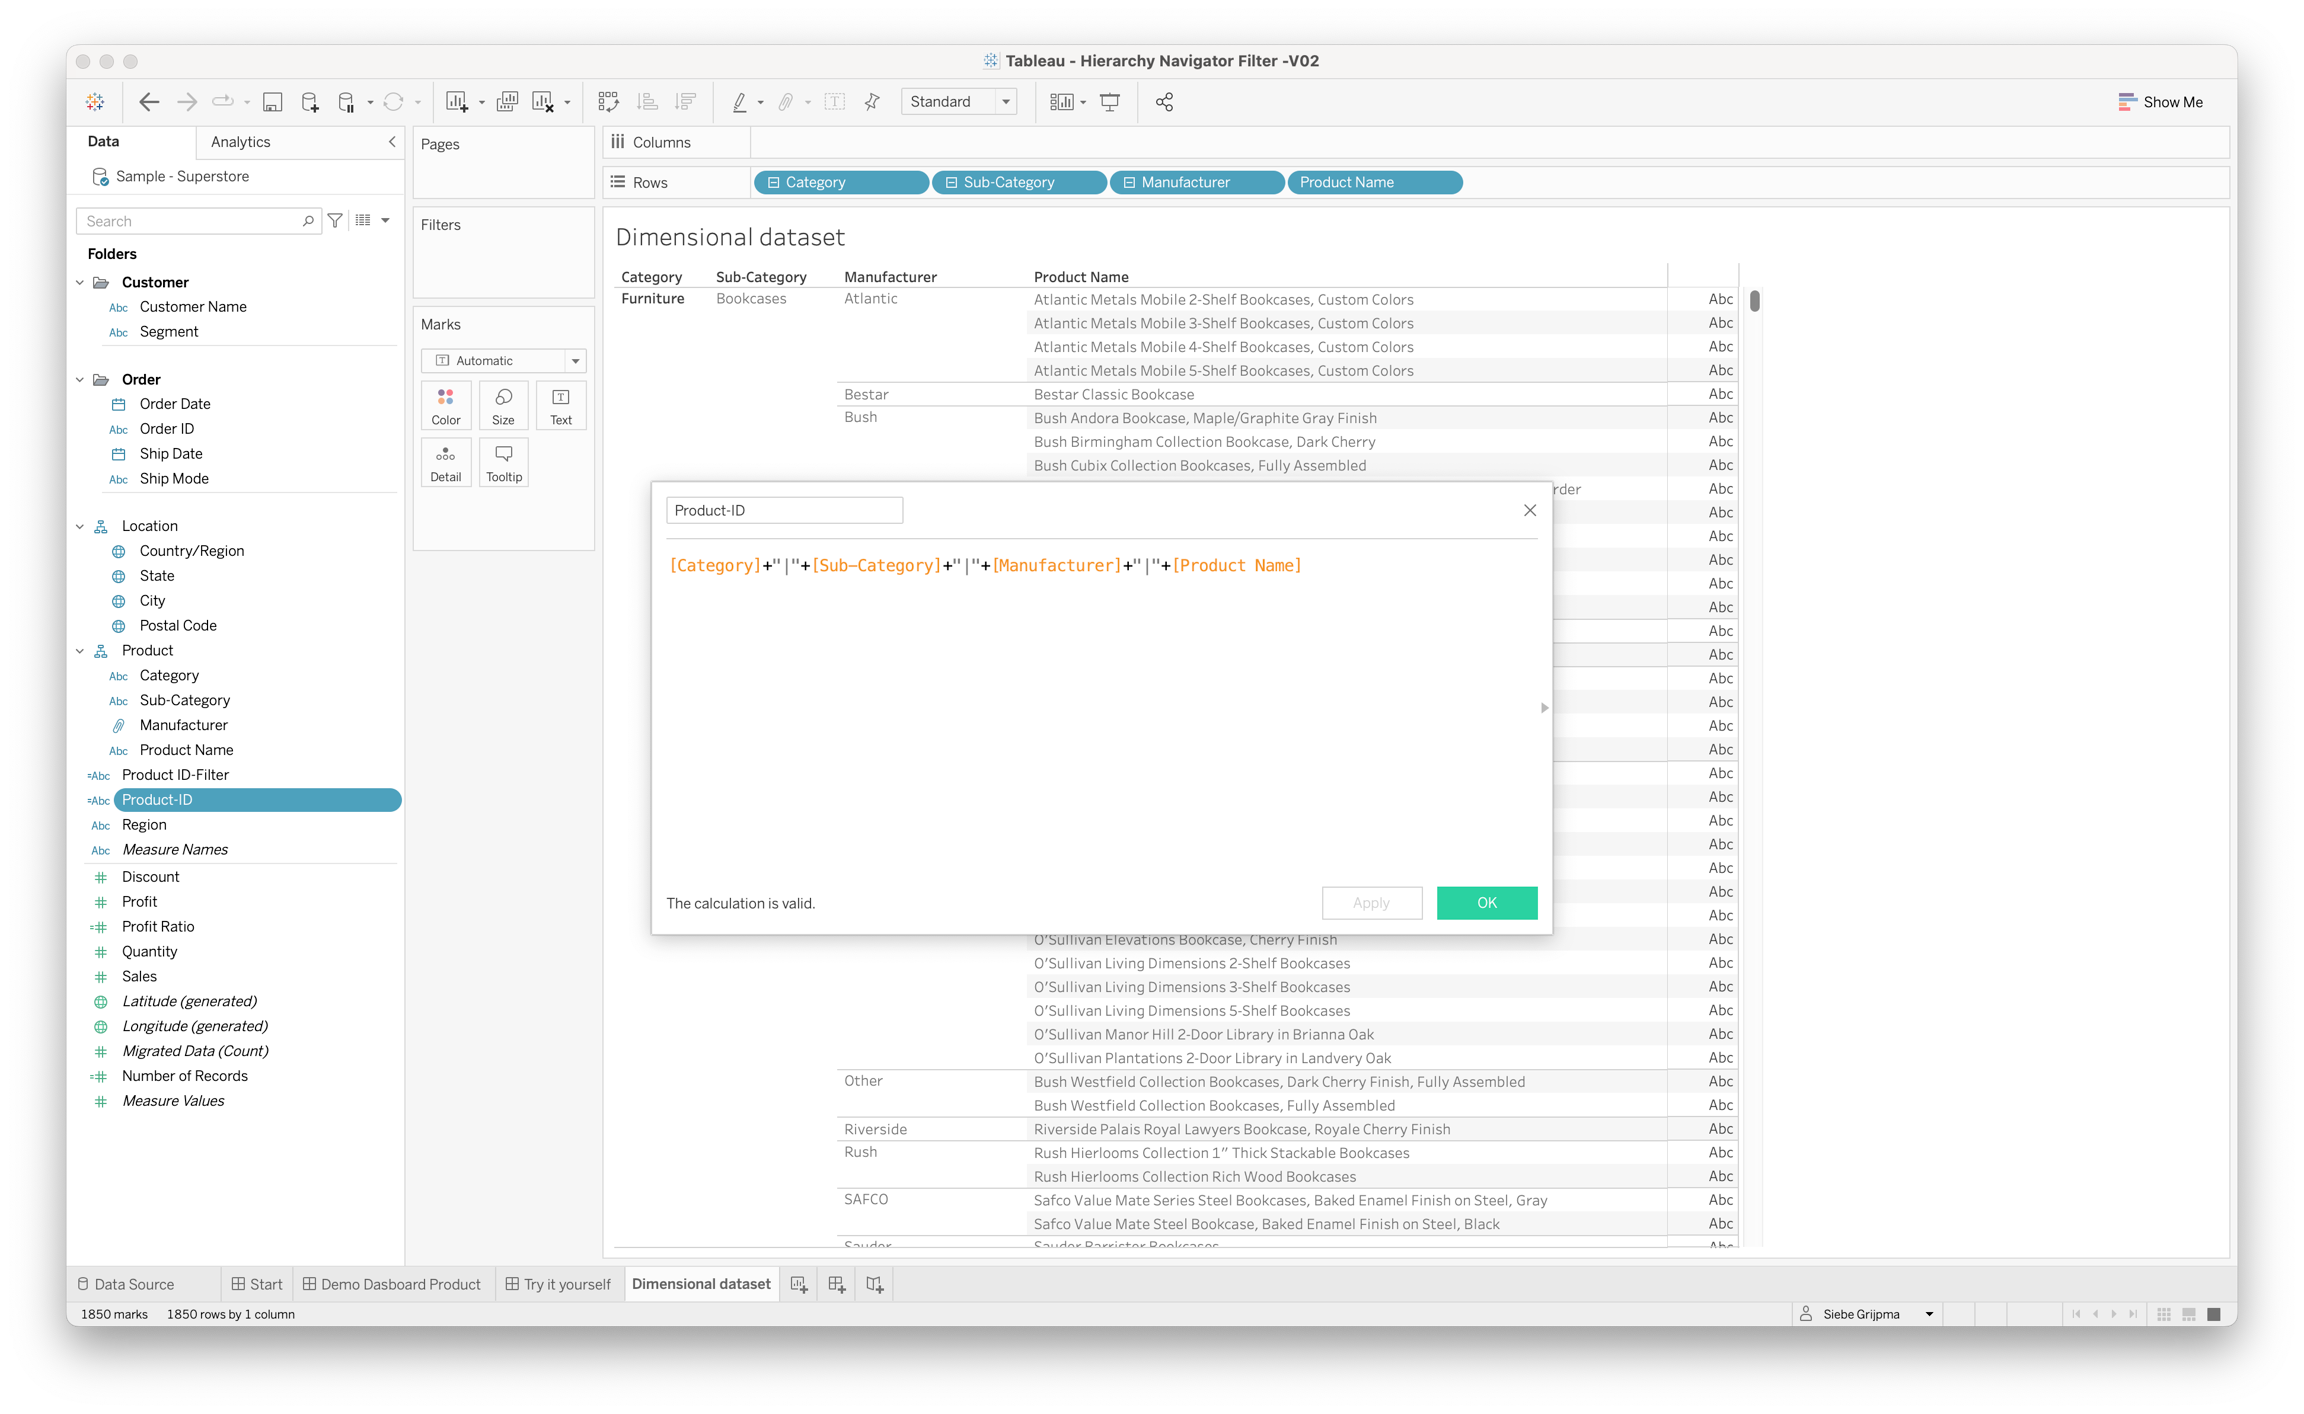
Our existing SuperStore Product structure is already organized in a Tableau hierarchy. It is not necessary to use a Tableau hierarchy upfront, we will be creating our own structure that will feed the extension in a calculated field. To do so create a calculated field as type “String” that consists of all dimensions you want to be part of the hierarchy, separated by a separator (we use the pipe symbol | in our example). The structure of the calculated field is shown in the image (click to enlarge).
Add the hierarchy calculated field to your datasheet
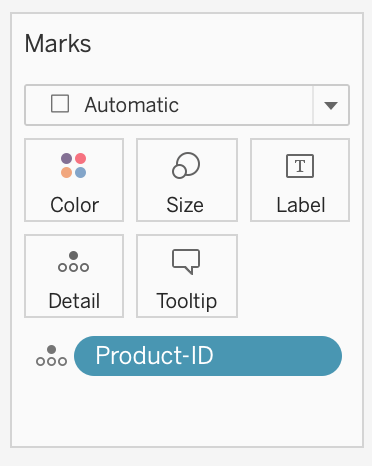
The last step to complete the datasheet is adding the calculated field (in this example Product-ID) to the details of the Marks pane like shown in the image below.
Last updated