
Connecting to the Microsoft Graph API
Before starting the Graph setup within MailScheduler, you will need to have a Tenant ID, Client ID, and Client secret.
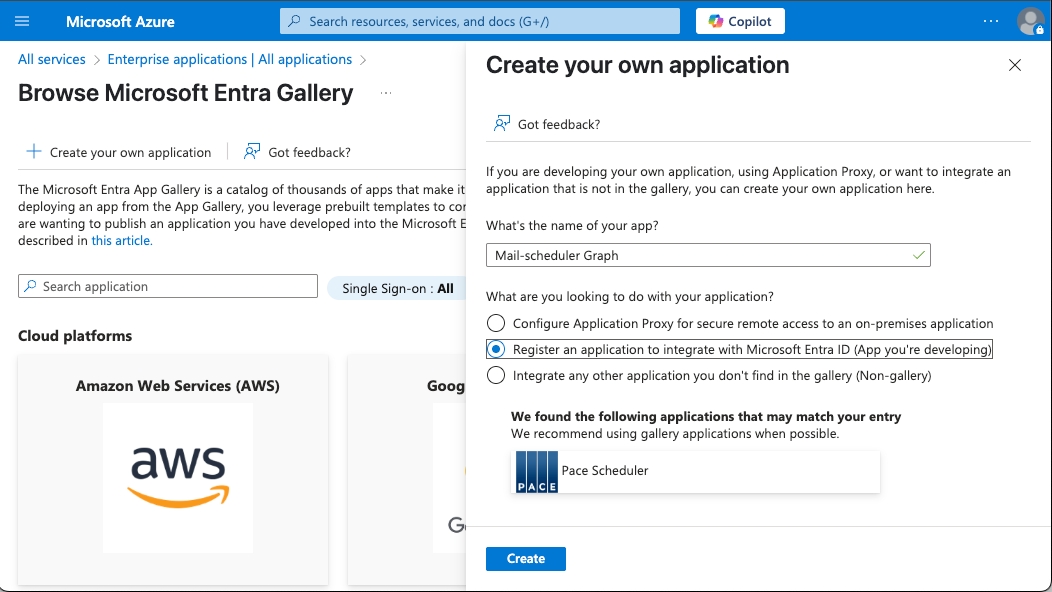
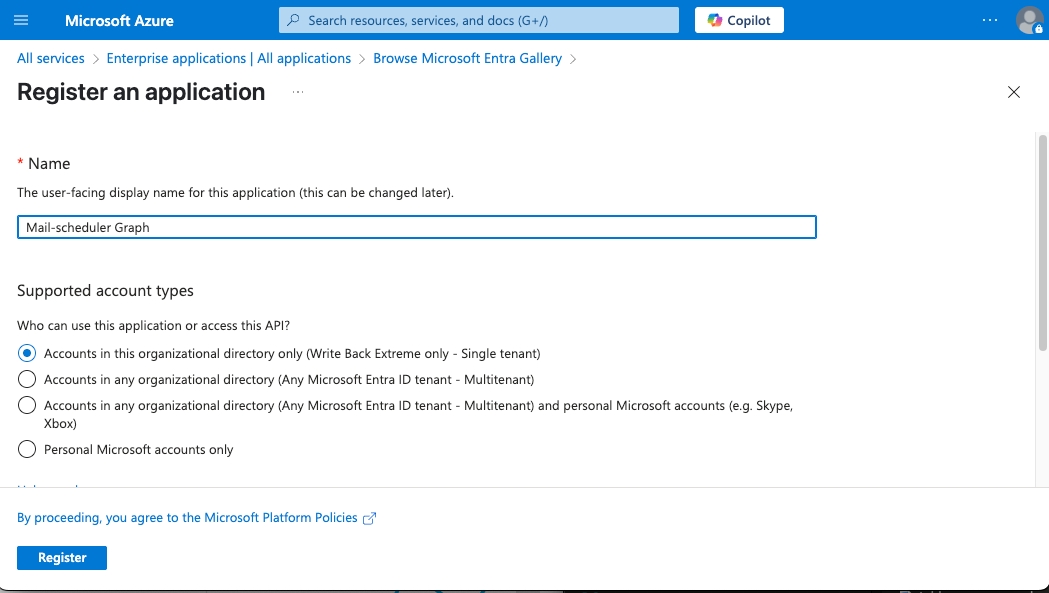
To do this, you will need to create an App Registration in Entra / Azure.
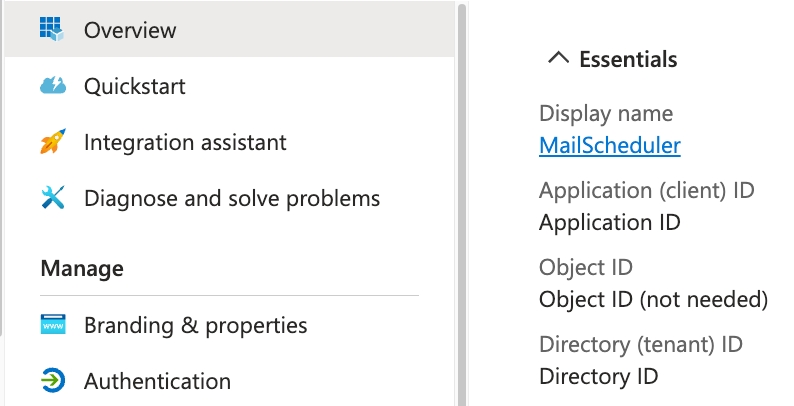
Afterwards, you can copy your Tenant ID and Client ID from the overview Part of your App registration:
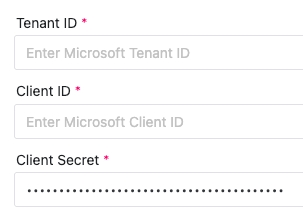
Now, you can navigate to the Microsoft Graph tab in the MailScheduler Settings, where you will see this screen:

Paste your Tenant ID and Client ID in their respective fields. Next, we will set up the return URL. Press the button next to the URL here, to copy it to your clipboard, and then head back to Entra. Navigate to the 'Authentication' part of your app registration, and click 'Add URI', and then web. Paste the return URL into the field, and click add.
After adding the return URL, you will see two checkboxes in the Authentication part of the Entra management panel, one for 'Access tokens', and one for 'ID tokens'. Make sure that ID tokens are checked, and save your authentication setup.
It will need to be entered in the 'Authentication' part of your App registration. Make sure that 'ID tokens' is selected.
Client secret
Navigate to 'Certificates & secrets'. Under the secrets header, make a new client secret, and copy the client secret value into correct field in Mailscheduler.

Deciding on Permission scope
Depending on whether you want to use the Microsoft Graph API to only send Emails, Teams messages, or both, you can select a different permissions scope:

For each scope, the only included permissions are the bare minimum for their respective functions.
Final step
Finally, click 'Save MS Graph Settings', and then press 'Authenticate with Microsoft Graph'. This will will open up a dialog, where you need to log in with the account that you want to use to send emails and / or Teams messages. It is recommended to create a new 'Mailscheduler' user.
In the dialog window, you may be asked to request permission to the app from an Administrator. After pressing 'request', wait for the required permission, and then simply go through the authentication process again, by clicking on the same button.
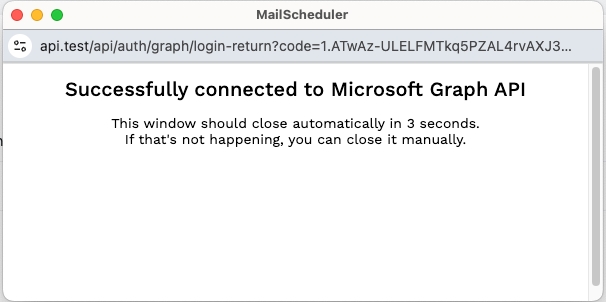
When you get this popup screen, your setup was successful!
Last updated
Was this helpful?