> For the complete documentation index, see [llms.txt](https://docs.infotopics.com/llms.txt). Markdown versions of documentation pages are available by appending `.md` to page URLs; this page is available as [Markdown](https://docs.infotopics.com/trulyp/writebackextreme-old/getting-started/upgrade/upgrade-from-2.x.md).
# Upgrade from 2.x
In the upgrading process, steps differ between Linux and Windows systems. Quickly navigate to your preferred section:
* [Upgrade on Windows](#windows)
* [Upgrade on Linux](#linux)
### Windows
The greatest part of WriteBackExtreme 3.0 is that it has a built-in webserver. In other words, it does not need to have IIS or XAMPP for serving the application anymore.
This guide will explain how to transfer configuration to the new WriteBackExtreme 3.0 application and how to disable/remove the current webserver to be able to reuse the system ports.
The upgrade setup of WiteBackExtreme 3.0 requires the following information:
* The .env file of your current installation.
* The LICENSE file (downloaded from our portal or copied from your current installation)
* The URL and port that is used by the current installation.
* The SSL Certificate (in .pfx or .crt & .key format) that applies to the aforementioned URL
In this guide, we will extract this information from the current installation.
#### Lets get started!
1. Create a backup of the installation directory of WriteBackExtreme.
You will need the .env and LICENSE files that are in there for the new installation.
Your current version of WriteBackExtreme can be served by either XAMPP or IIS. Follow the steps for your type of installation in the appropriate section below.
#### Internet Information Services (IIS)
We need to do 3 things:
* Export SSL Certificate
* Retrieve the URL and port
* Stop IIS
Export SSL Certificate
The first step is to locate and export the SSL Certificate. Note that it is only possible to export the SSL certificate when it was marked as \`Exportable\` while it was imported in the past. When the certificate is not exportable, you need to get the original certificate from your IT Department.
1. Open the Internet Information Services (IIS) Manager. You can usually find it by searching for “IIS” in the Start menu.
2. In the left-hand pane of the IIS Manager, click on the server node
3. In the middle pane, double-click on the \`Server certificates\` icon.
4. Right-click the certificate that is valid for the URL of your WriteBackExtreme instance
5. Select \`Export\` from the context menu.
6. Export to Desktop and set a password. You will need this password in the WriteBackExtreme 3.0 installation.
Retrieve URL and Port
The second step is retrieving the URL and port number that is configured for WriteBackExtreme:
Stopping the Webserver
The third step is about unlocking the port that is being used by IIS so the new WriteBackExtreme application can run on the same port.
When WriteBackExtreme is one of multiple sites served by IIS you can simply stop the website by right-clicking on the WriteBackExtreme site in the left pane and select \`Manage Website\` -> \`Stop\`.
When WriteBackExtreme is the only site that is configured in IIS we can safely stop IIS completely:
1. In the left pane, Right-click on the server node (the root node)
2. Select Stop from the context menu.
3. We should now remove IIS as a service to prevent it from being started automatically on system startup:
* Open the start menu and type ‘Services’.
* Open the Services app.
* Search for \`World Wide Web Publishing Service\`
* Right-click on it and select Properties from the context menu.
* Set the startup type to \`Disabled\`. Then press OK.
#### XAMPP
1. Open the vhosts file of your XAMPP configuration. The file is typically located at `C:\XAMPP\apache\conf\extra\httpd-vhosts.conf`
* From this file, you’ll need to find the location of the SSL certificates of this domain. (search on `SSLCertificateFile` to find it easily)
* When WritebackExtreme is not the only site served by Apache2, you need to remove the whole block of the WriteBackExtreme site.
2. Open the XAMPP control panel as an administrator
* Stop Apache2 as a service
3. When the repository database of WriteBackExtreme is MySQL you still need XAMPP to keep that database running. In that case, you can simply stop the Apache process by opening the XAMPP Control panel and stop Apache manually. Do not forget to stop the service as well.
* When the repository database of WriteBackExtreme is NOT MySQL, you can remove XAMPP from your system. This will make the ports available for the new WriteBackExtreme 3.0 installation
When WriteBackExtreme is NOT the only site that is served by XAMPP, you’ll need to change the DNS of the WriteBackExtreme domain to use another port than 443 or 80 since that is still in use by XAMPP.
#### Upgrading through Installer
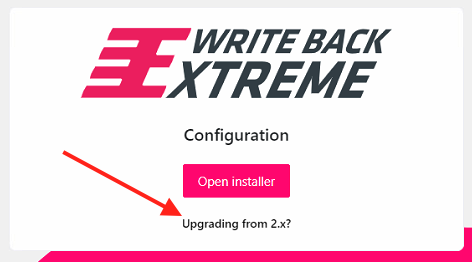
After stopping the old WritebackExtreme you can launch the new 4.x Installer by double-clicking the application. On the first screen, select `Upgrade from 2.x?` the link.
This page allows you to upload the .env file of the old installation. After uploading the application starts the installation process. You will see that step 3 (database Setup) and step 4 (User creation) can be skipped.
### Linux
The greatest part of WriteBackExtreme 4.0 is that it has a built-in webserver. In other words, it does not need to have Nginx or LAMPP for serving the application anymore.
This guide will explain how to transfer configuration to the new WriteBackExtreme 4.0 application and how to disable/remove the current webserver to be able to reuse the system ports.
The upgrade setup of WiteBackExtreme 4.0 requires the following information:
* The `.env` file of your current installation.
* The `LICENSE` file (downloaded from our portal or copied from your current installation)
* The URL and port that is used by the current installation.
* The SSL Certificate (in `.pfx` or `.crt` & `.key` format) that is applicable to the forementioned URL
In this guide we will extract this information from the current installation.
#### Lets get started!
1. Create a backup of the installation directory of WriteBackExtreme and database.
2. Stop the Nginx or Apache service, so WriteBackExtreme is no longer running.
3. Disable the Nginx and Apache services so they don’t restart after reboot.
4. Copy the files above to a safe location.
5. Start the installation procedure from stap 1 in this installation guide.
6. You will need the .env and LICENSE files that are in there for the new installation.
PS: When WriteBackExtreme is NOT the only site that is served by Nginx or Apache, you’ll need to change the DNS of the WriteBackExtreme domain to use another port than 443 or 80 since that is still in use by Nginx or Apache.
---
# Agent Instructions
This documentation is published with GitBook. GitBook is the documentation platform designed so that both humans and AI agents can read, navigate, and reason over technical content effectively. Learn more at gitbook.com.
## Querying This Documentation
If you need additional information that is not directly available in this page, you can query the documentation dynamically by asking a question.
Perform an HTTP GET request on the current page URL with the `ask` query parameter, and the optional `goal` query parameter:
```
GET https://docs.infotopics.com/trulyp/writebackextreme-old/getting-started/upgrade/upgrade-from-2.x.md?ask=&goal=
```
`ask` is the immediate question: it should be specific, self-contained, and written in natural language.
`goal` is optional and describes the broader end goal you are ultimately trying to accomplish on behalf of the user. GitBook uses it to tailor the answer towards what is most useful for that goal.
The response will contain a direct answer to the question and relevant excerpts and sources from the documentation.
Use this mechanism when the answer is not explicitly present in the current page, you need clarification or additional context, or you want to retrieve related documentation sections.