> For the complete documentation index, see [llms.txt](https://docs.infotopics.com/llms.txt). Markdown versions of documentation pages are available by appending `.md` to page URLs; this page is available as [Markdown](https://docs.infotopics.com/hierarchyfilter/getting-started/dimensional-dataset/set-up-dashboard-extension.md).
# Set-up dashboard extension
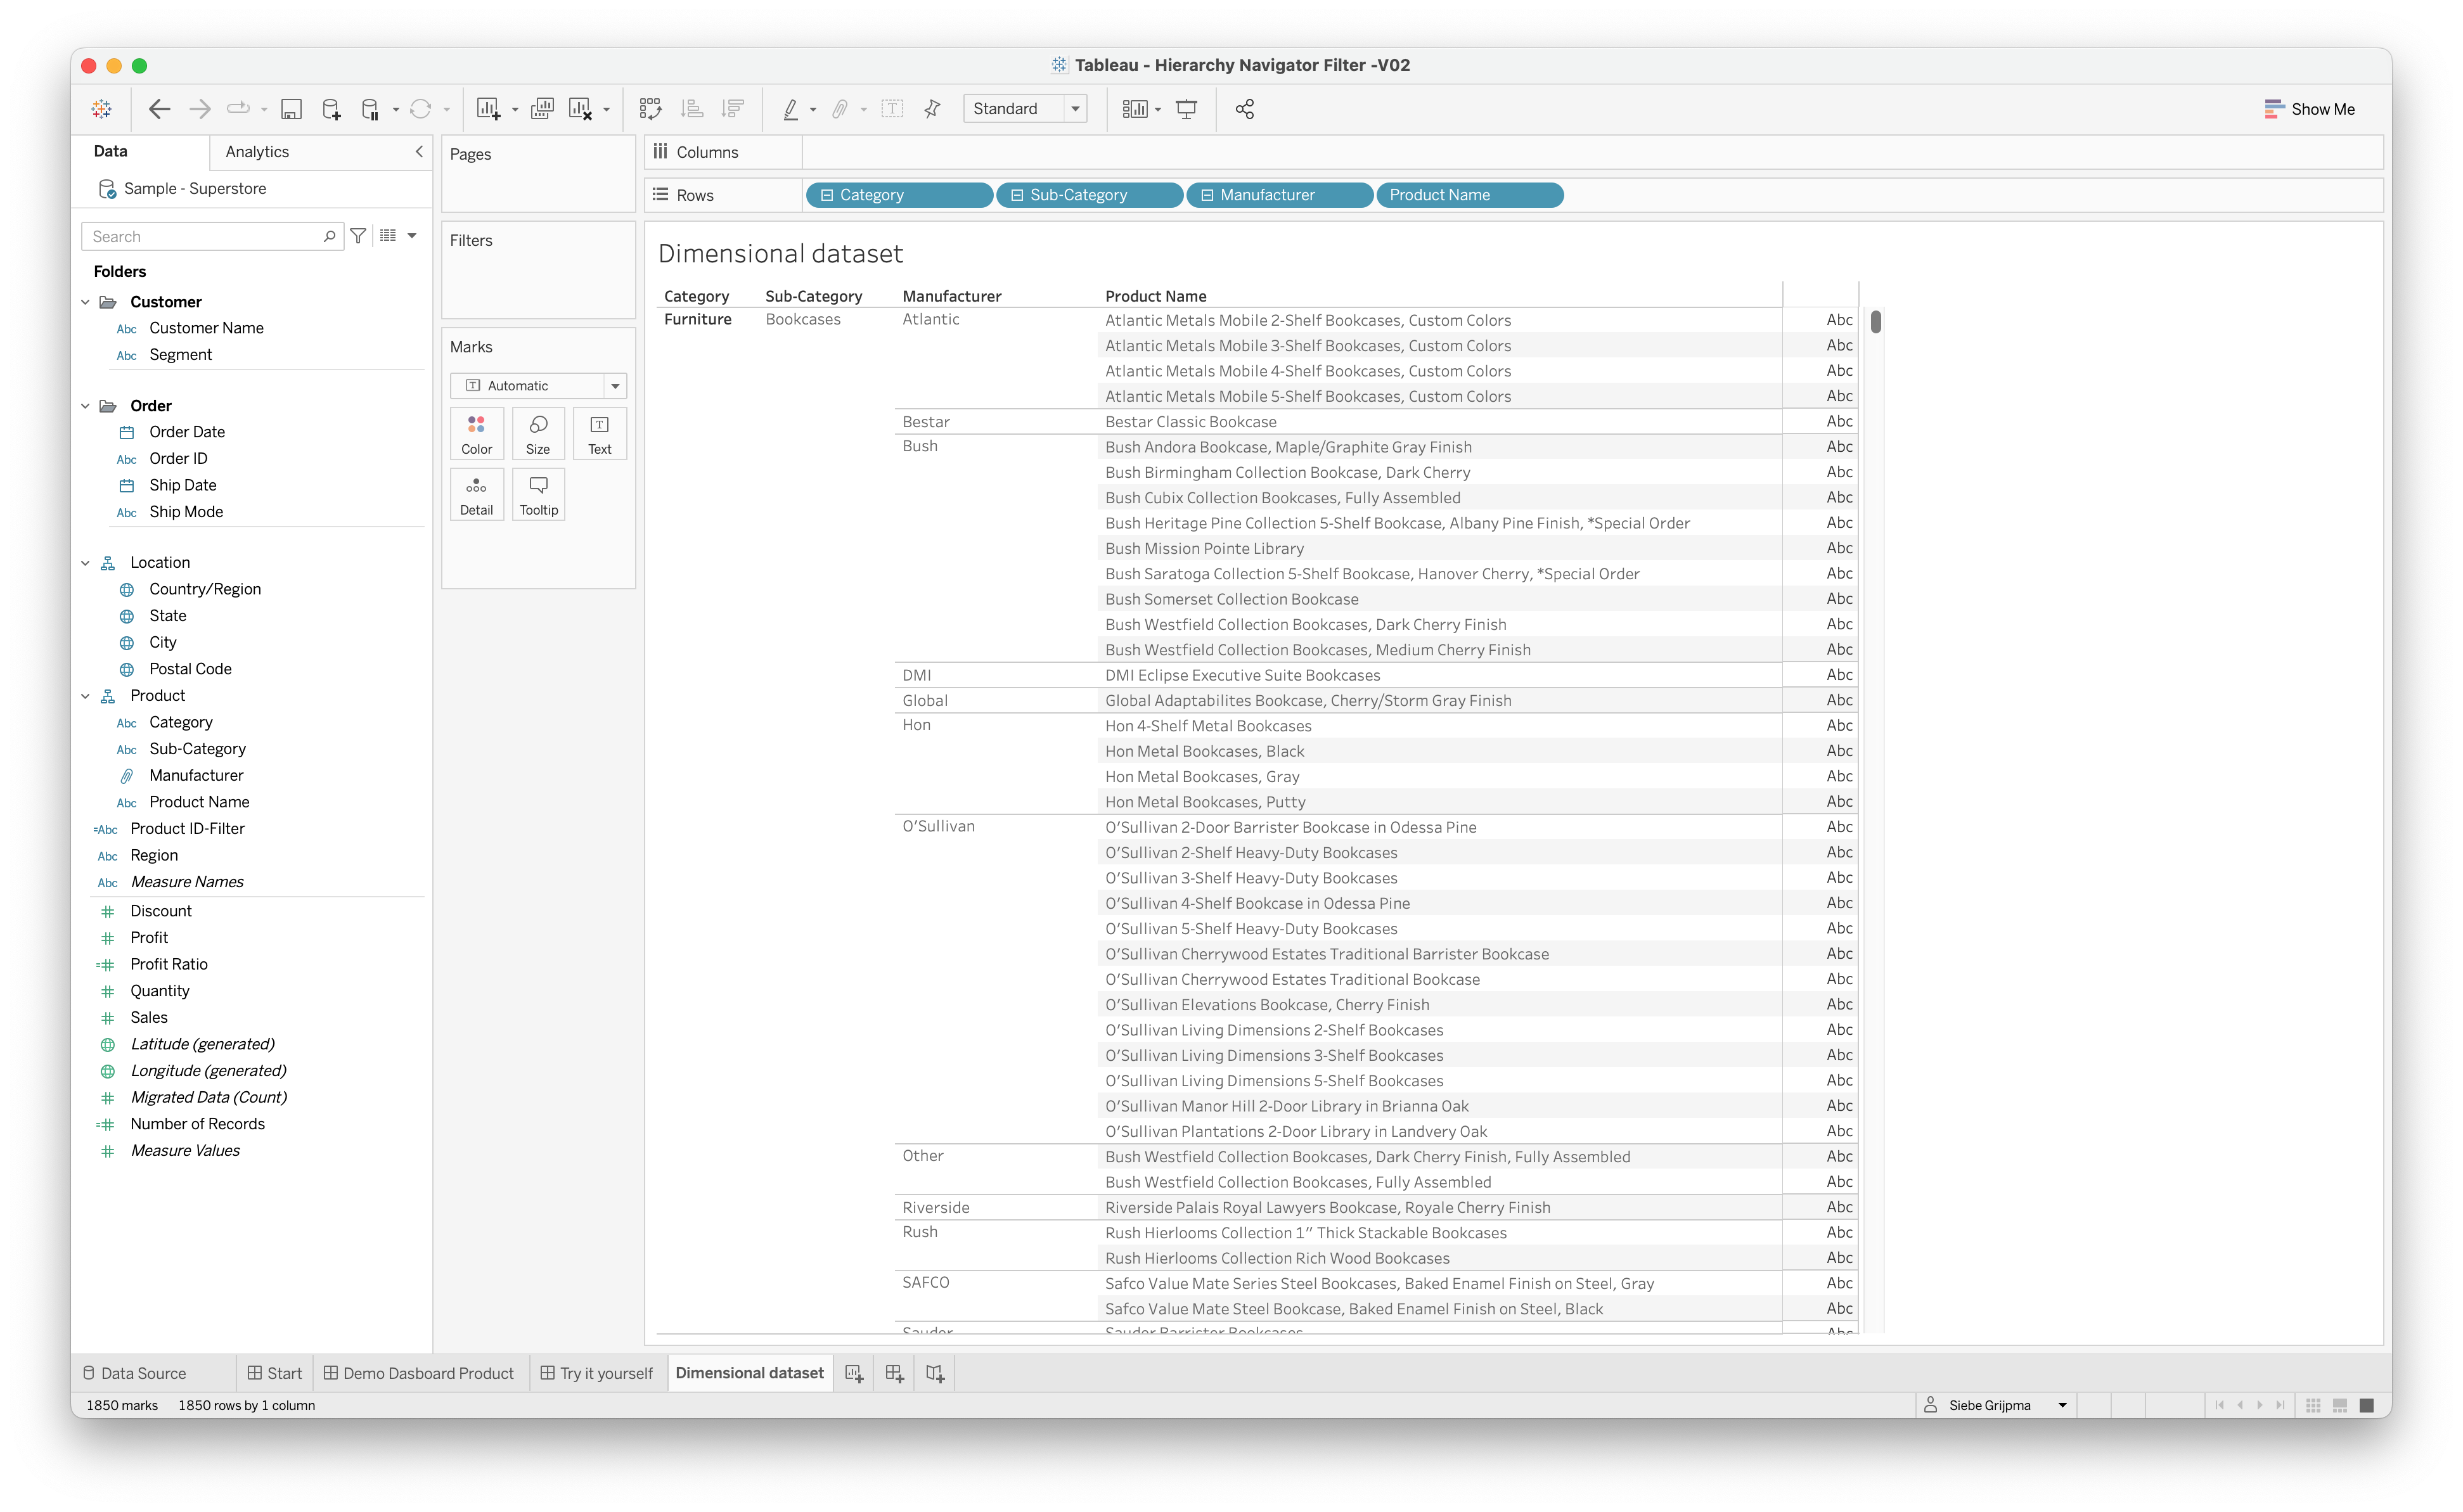
To set up the dashboard extension, you will need to create or use a datasheet with a dimensional data structure. In this example, we use Product structure from the SuperStore dataset which is already available as a hierarchy. The image shows an example of the Product structure hierarchy in the SuperStore dataset, but the dimensions don't have to be in a Tableau Hierarchy structure. The dimensions you want to use for the HierarchyFilter can be put on the rows shelve in any order.
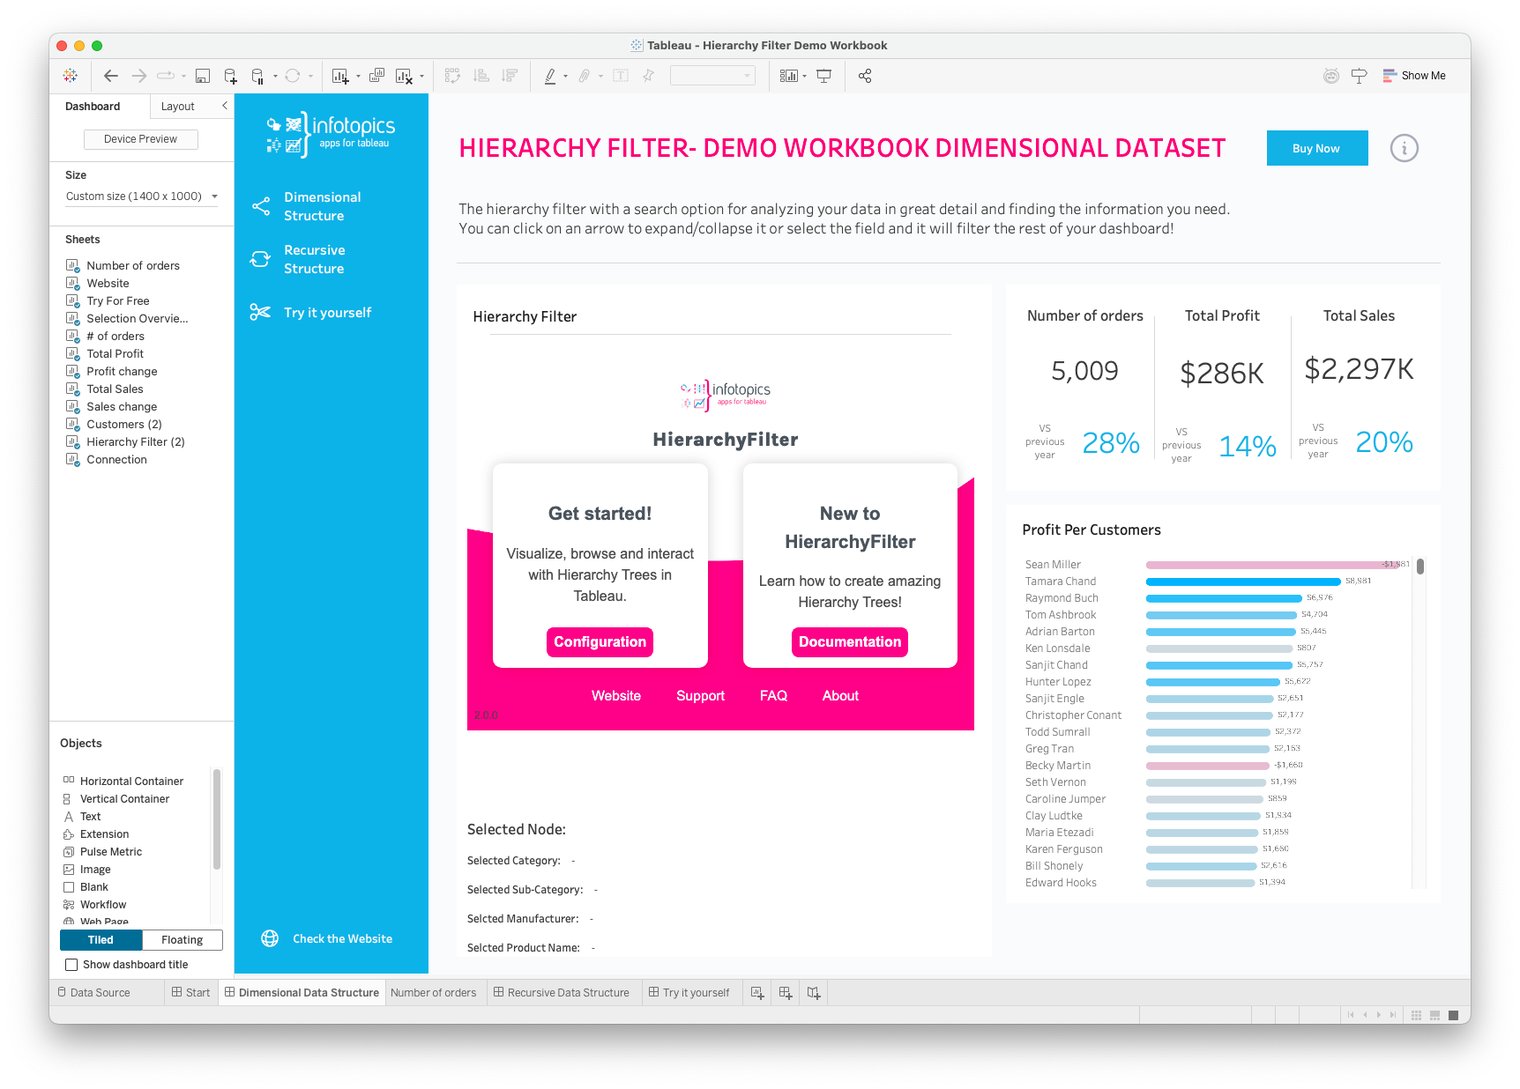
The next step is to create your dashboard with the HierarchyFilter. Create a new dashboard and add your hierarchy datasheet to the dashboard. This sheet contains the data that will feed the HierarchyFilter extension. You can also add some other Tableau visualization sheets to the dashboard based on the same data source. This way you can use the interactivity of the HierarchyFilter extension.
Now add the HierarchyFilter extension to the dashboard (use the trial Trex file or a Trex matching a purchased subscription). Your Dashboard should look something like the image below.
The next thing we need to do is configure the extension to use/visualize the hierarchy and make the dashboard interactive.
To enter the configuration screen, click on the "Configuration" button in the extension. alternatively, select the container of the HierarchyFilter extension and from the dropdown context menu select “Configure” as shown in the image below (click to enlarge).
#### Configuration wizard
A configuration menu will pop up. The configuration consists of wizard-like steps, indicated at the top of the screen. This is shown in the example below.
Here, select the dimensional data structure. For the set up of the recursive structure, look [here](/hierarchyfilter/getting-started/recursive-dataset.md). After choosing the structre type, we can go to the next page.
In the Sheets and Fields page of the configuration, we first need to select the datasheet we want to use. This is where the HierarchyFilter will get it's data. after selecting the sheet, a list of dimension and measure names will show in the Hierarchy fields list. Clicking on the add button will put it in the list on the left. The items in this list will be the levels of the hierarchy in order. You can change the order by dragging the items in the list.
The rest of the configuration is optional. You can click on next twice, and then on the done button to save the configuration. The rest of the options are explained in Configuration the configuration pages of this wiki.
After clicking on "submit" the HierarchyFilter should look like the image below.
---
# Agent Instructions
This documentation is published with GitBook. GitBook is the documentation platform designed so that both humans and AI agents can read, navigate, and reason over technical content effectively. Learn more at gitbook.com.
## Querying This Documentation
If you need additional information that is not directly available in this page, you can query the documentation dynamically by asking a question.
Perform an HTTP GET request on the current page URL with the `ask` query parameter, and the optional `goal` query parameter:
```
GET https://docs.infotopics.com/hierarchyfilter/getting-started/dimensional-dataset/set-up-dashboard-extension.md?ask=&goal=
```
`ask` is the immediate question: it should be specific, self-contained, and written in natural language.
`goal` is optional and describes the broader end goal you are ultimately trying to accomplish on behalf of the user. GitBook uses it to tailor the answer towards what is most useful for that goal.
The response will contain a direct answer to the question and relevant excerpts and sources from the documentation.
Use this mechanism when the answer is not explicitly present in the current page, you need clarification or additional context, or you want to retrieve related documentation sections.